Overview of the HTML Editor
This guide provides an overview of the built-in HTML editor in DTU Learn
The editor itself looks and works like a classic text editor including some options for formatting and fonts
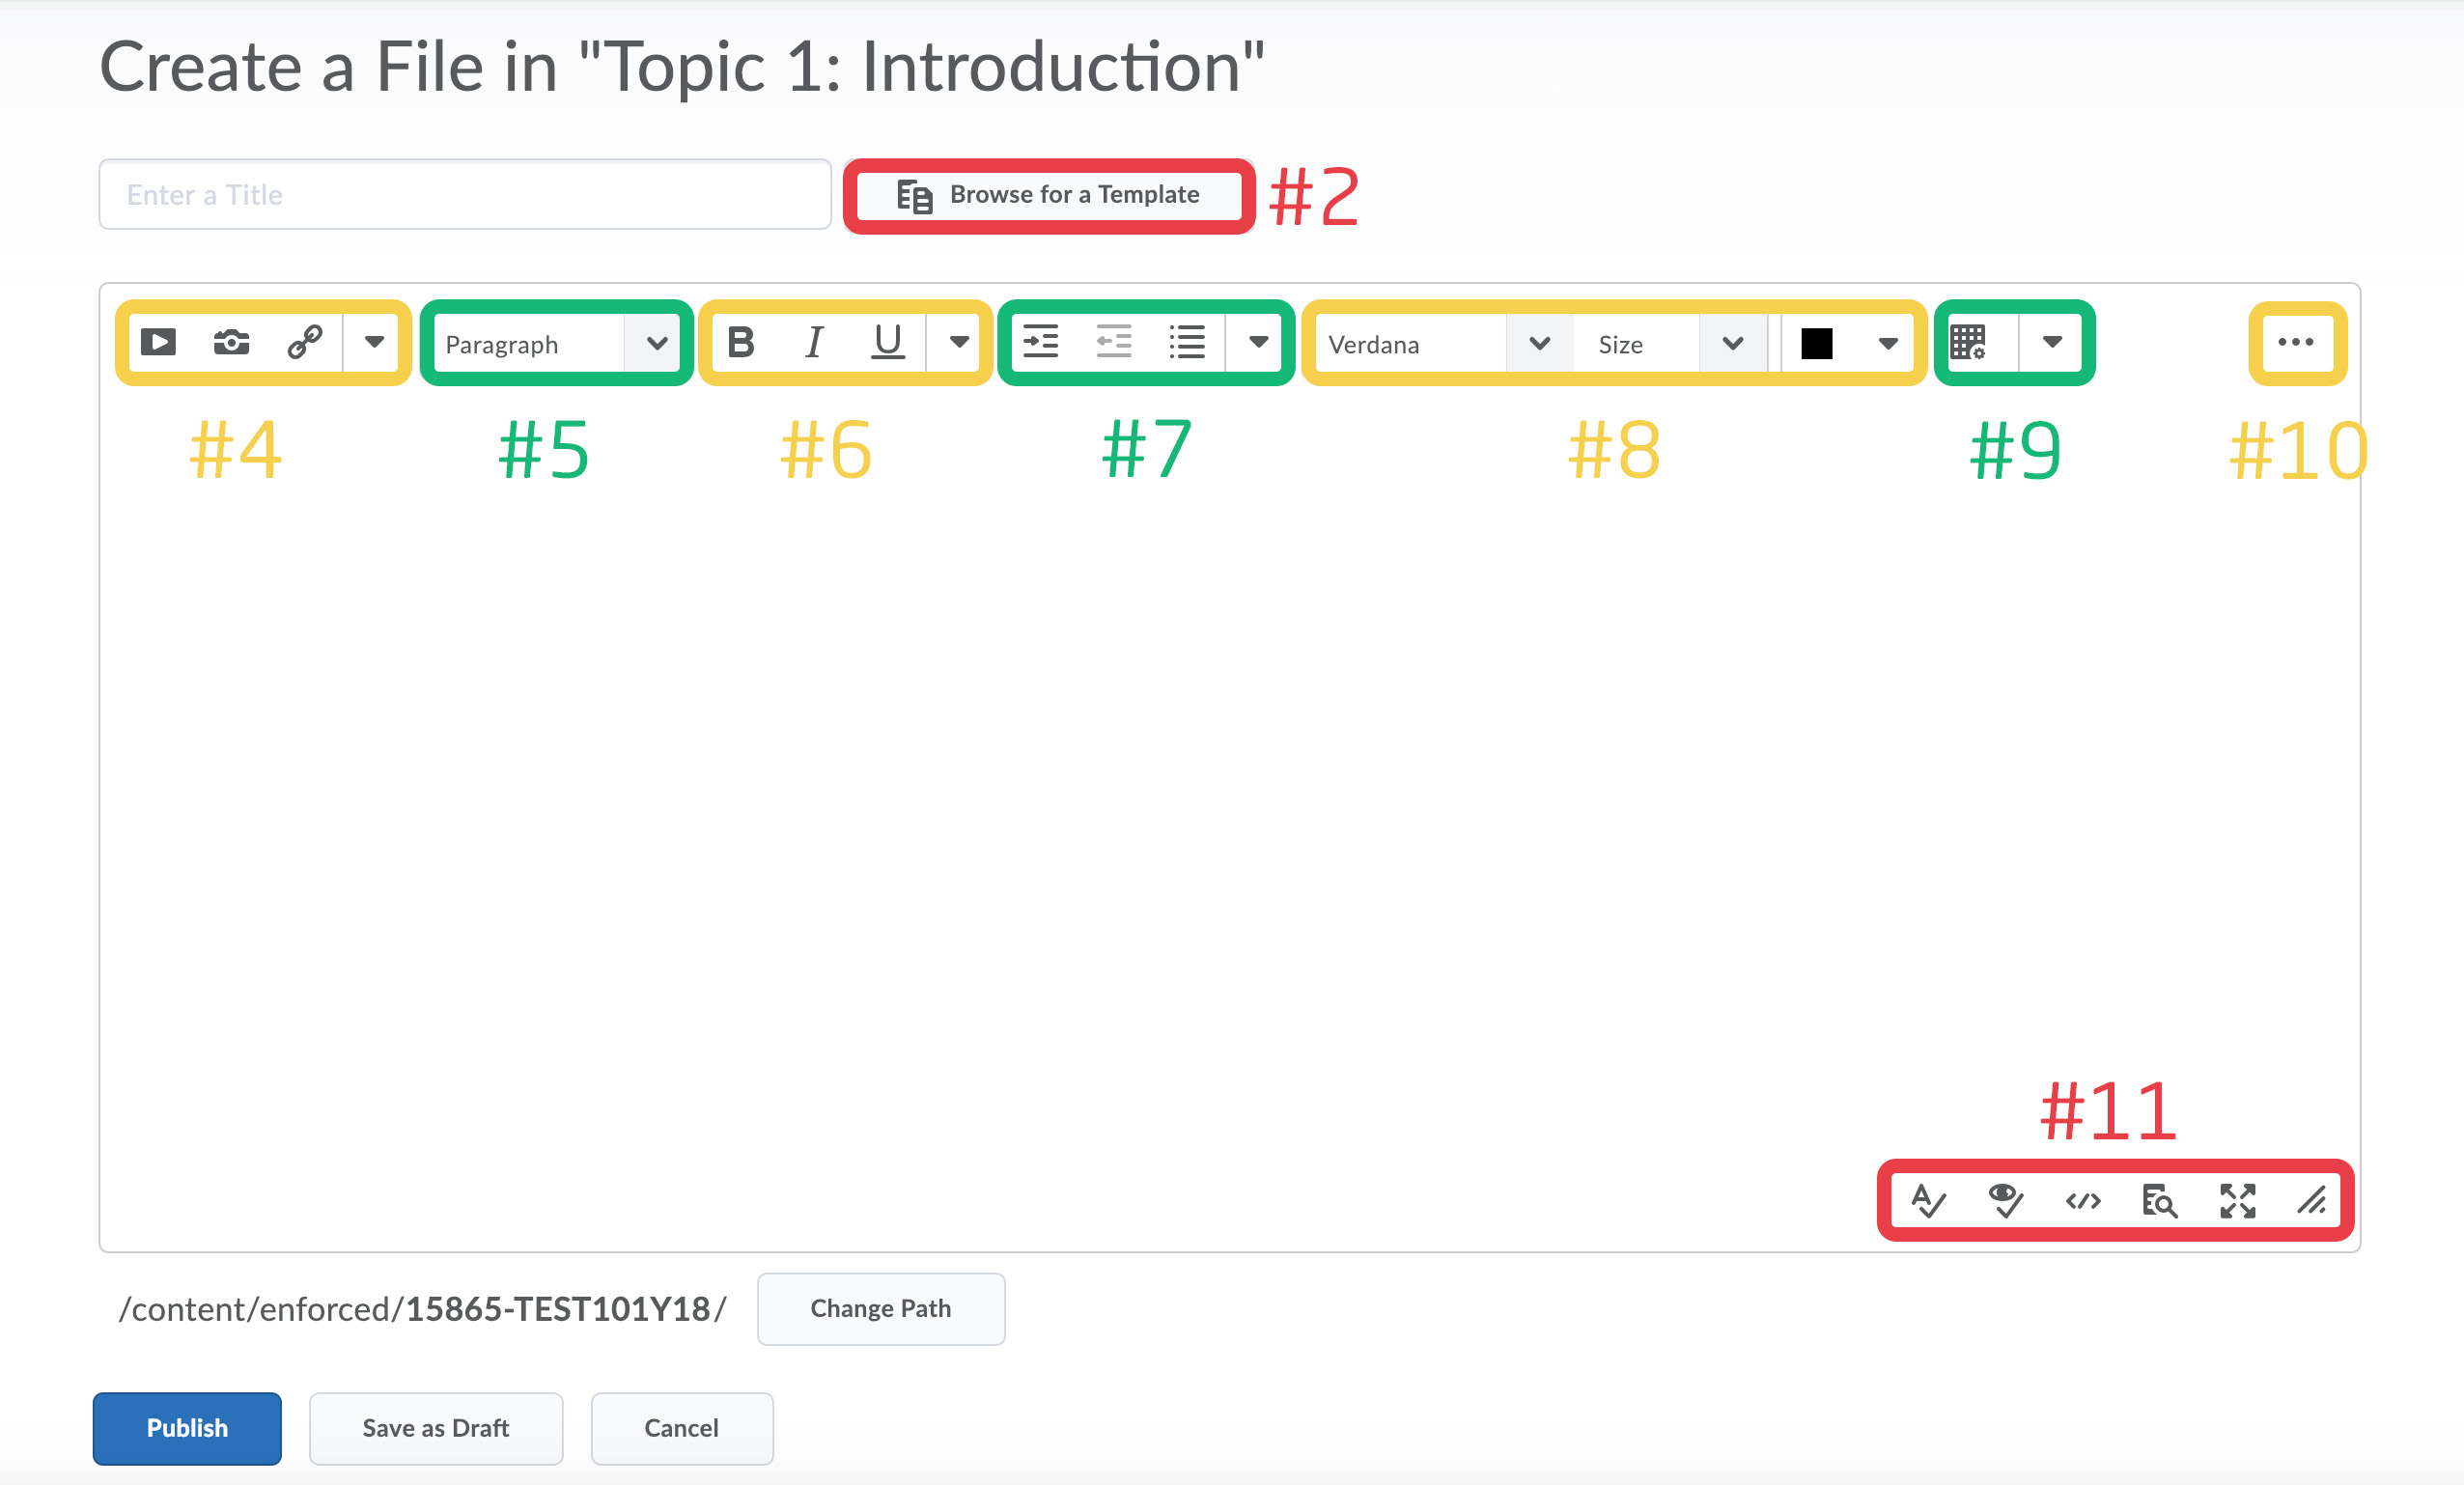
- The editor consists of these parts:

- The editor itself, looks and works like a classic text-program- You have got a wide array of possible formatting and fonts like in word or similar programs.
- Insert Options. Use this to insert videos, pictures or links on the page.
- The paragraph styling will allow more consistency in your content by streamlining fonts and sizes. Remember to use the same paragraphs across your course. Highlight the text you want to stylize and select the style you want to apply.
- Text formatting options allows stylizing individual selected texts. You can select bold, italic and underline. By clicking the small arrow you get another three options - Strikethrough, Subscript and Superscript.
- From this box you can make indentations or change the alignment of your paragraphs. If you want to make lists, by numbers or bullets, you can do this here as well.
- The font formatting options allows you to change the font, size and color.
- You can add a table, with a lot of modifiable options as well.
- In your editor you might see these three dots. This means that there are additional options. By clicking this, these will show. This can be equations, copy, paste and the undo button.
- In your lover right hand corner of the editor, you can change the size of the editor, go full-screen, check spelling or make a preview of your page, to see how the site appears for your students. If you know your way around coding, click the small symbol to go directly to the HTML-code.

