Importing Group Members Using a File in the Groups Tool
This tutorial guides you through importing users into groups using a TXT or CSV file within the Groups tool in your course.
Note:
Only users who are already enrolled in the course can be added to groups. Additionally, only users with the roles Student or Student (no exam) can be enrolled via this method.
Follow these steps to enroll users to groups:
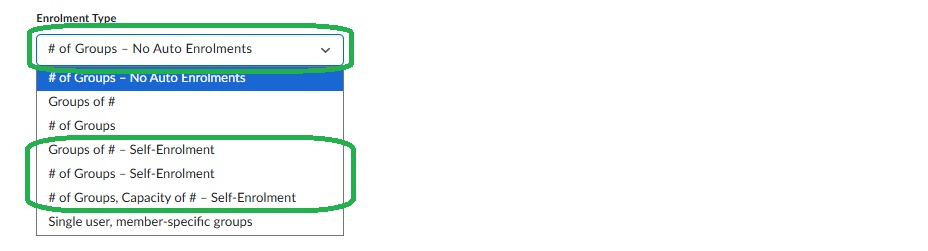
- Create the Groups
Follow this tutorial to create your groups: Creating Groups.
Note: Choose an Enrolment Type that does not include auto-enrollment.
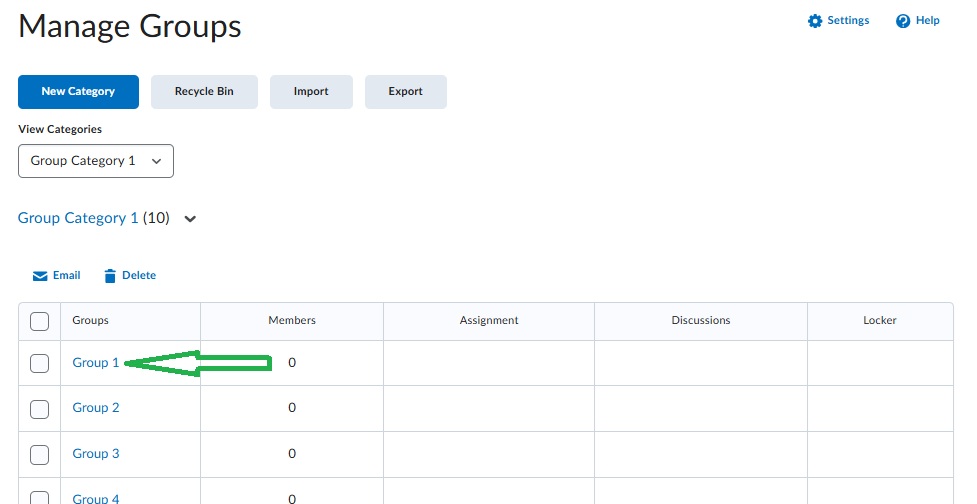
- Note the 'Group Codes'.
After creating the groups, locate and note the Group Codes for each group. These will be used in your import file.

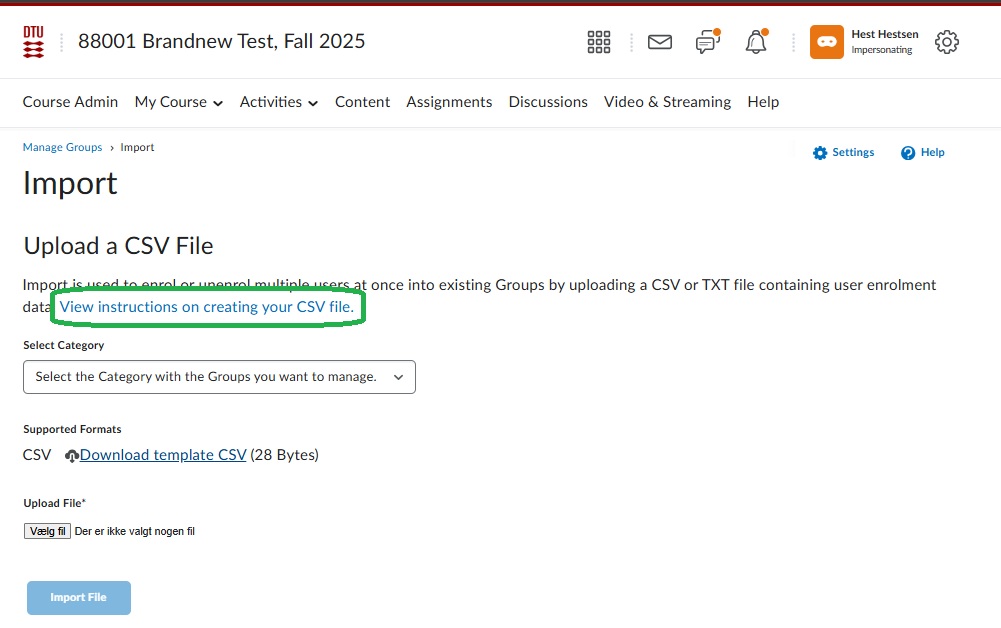
- Go to 'Import'.

- Review the Instructions
Before proceeding, we recommend reviewing the instructions.
- Prepare Your Import File
Create a .txt or .csv file with the following structure:
- Action: Specify whether you want to ENROLL or UNENROLL users.
- Username: List the usernames of the students (found in the Classlist). Ensure they have the correct role.
- Group Code: Add the Group Code for the group you want to assign the user to.

Note:
- Do not include a header row.
- Use commas to separate values.
- Ensure all usernames are valid and match the required roles.
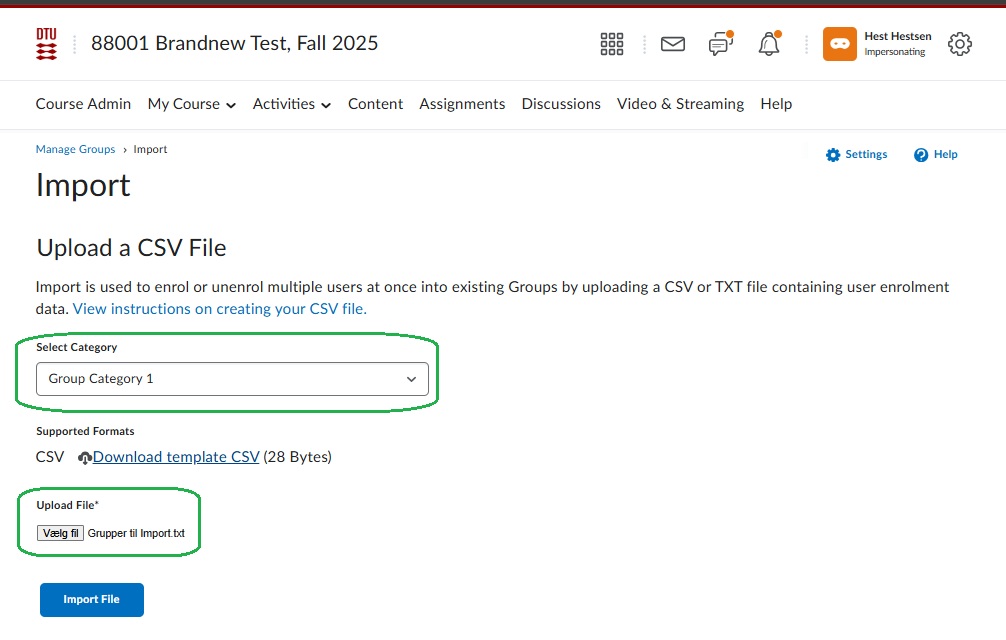
- Upload the File
Select the Group Category you want to update.
Click Choose File, select your .txt or .csv file, and then click 'Import File'.
- Review Groups
Once the file is processed, click Done.
You will be redirected to ‘Manage Groups’, where you can review the group enrolments.
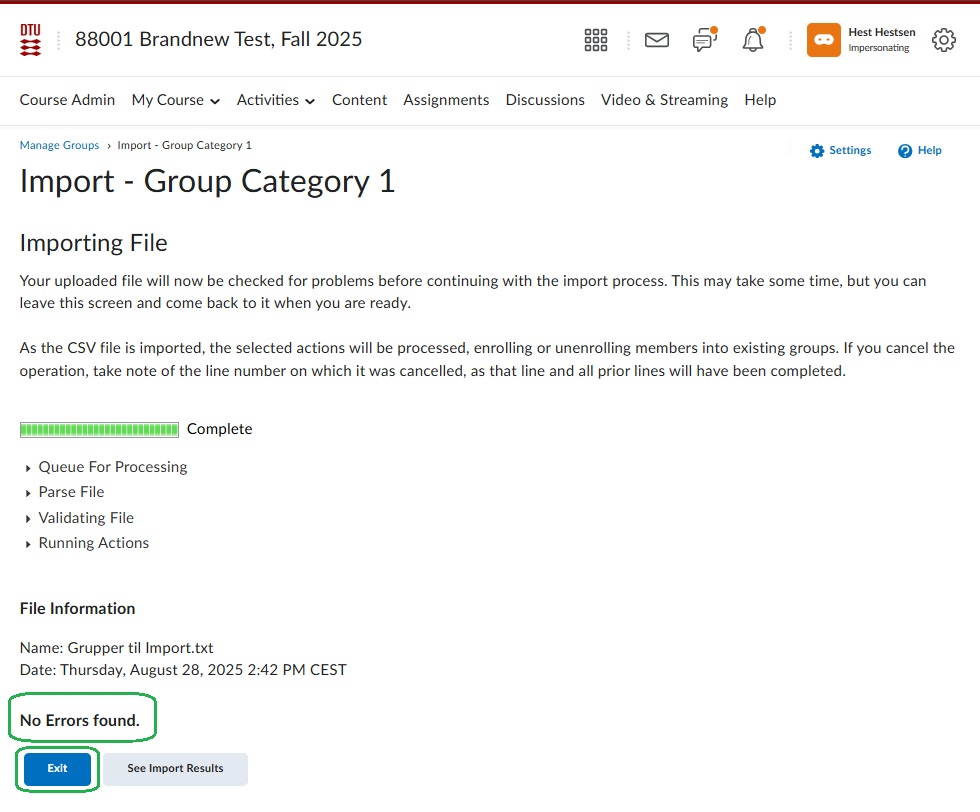
- Troubleshooting Errors
If the import fails, click 'View Errors' to see what information to correct in your file.

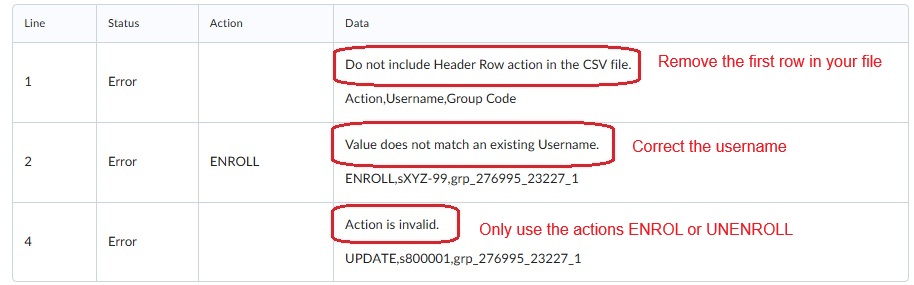
Note - You will not receive an error if:
- You include users with roles other than Student or Student (no exam).
- You attempt to unenroll users who were not enrolled in the group.