Customize Navbar
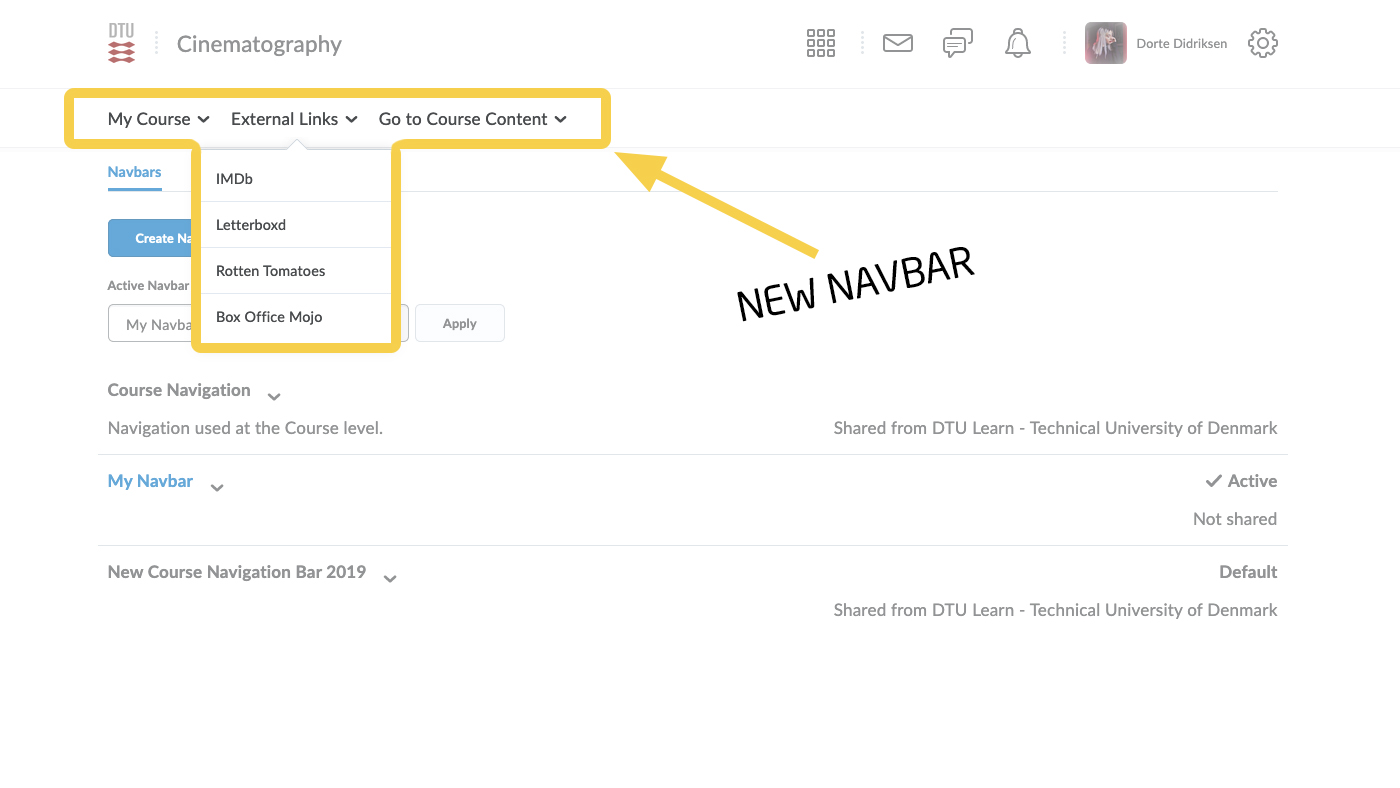
Customizing your navbar may create a better experience and a clear learning path for your students. Get rid of elements you aren't using and add internal and external links.
In this tutorial we will start out showing how to create a new link group and how to modify an old group. If you only want to add a link or make small adjustments, go to the third part of this tutorial, called: Create new navbar.
Create new link group:
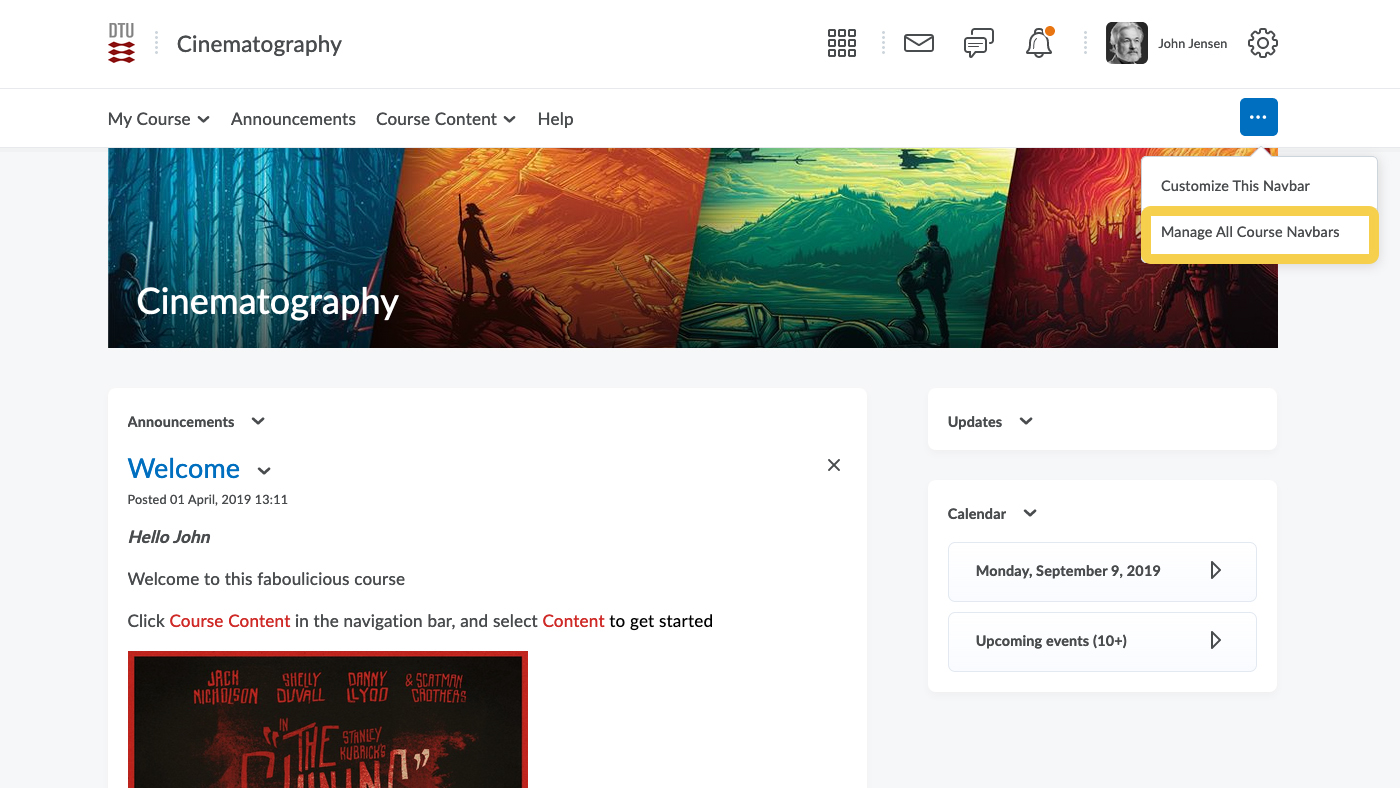
- From your course, click the button on the right hand side of the navbar, and select Manage All Course Navbars.
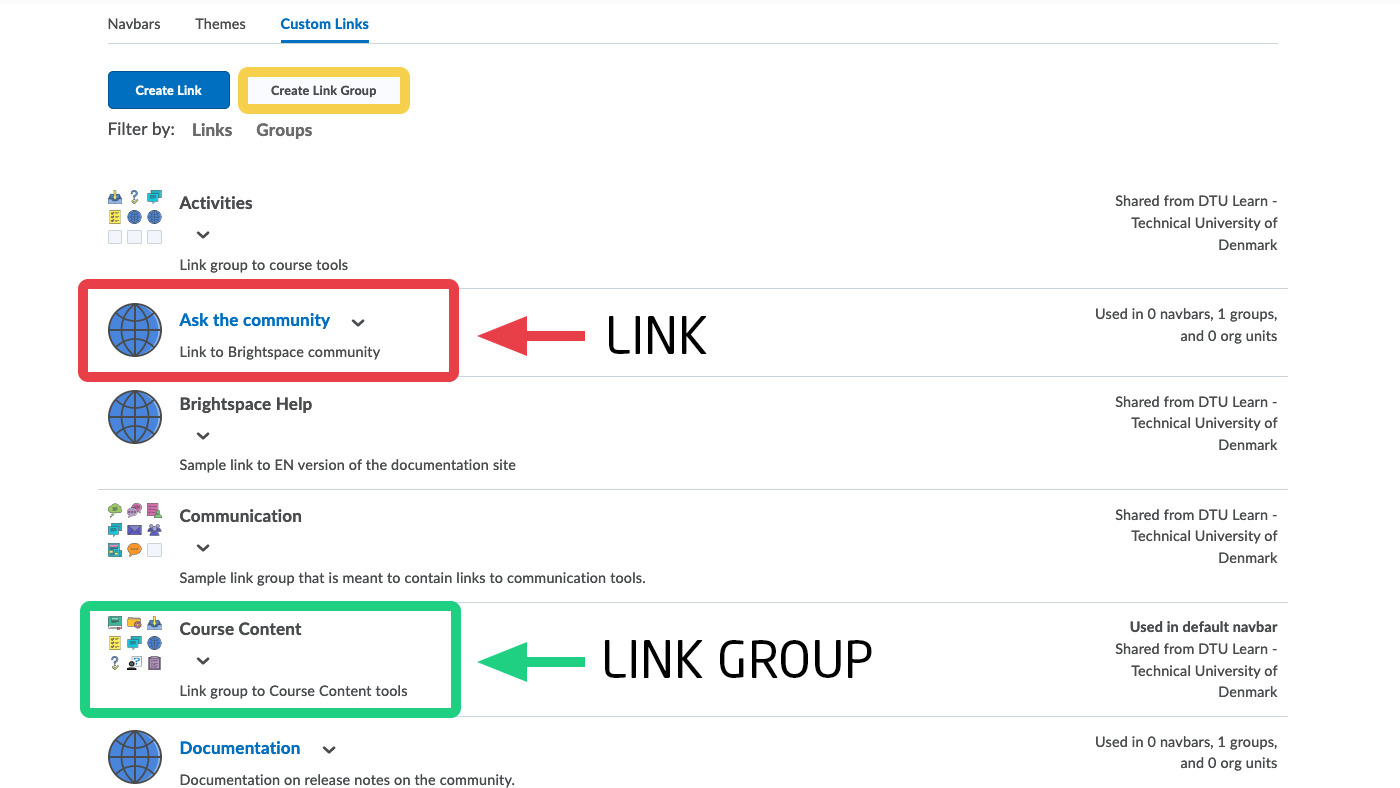
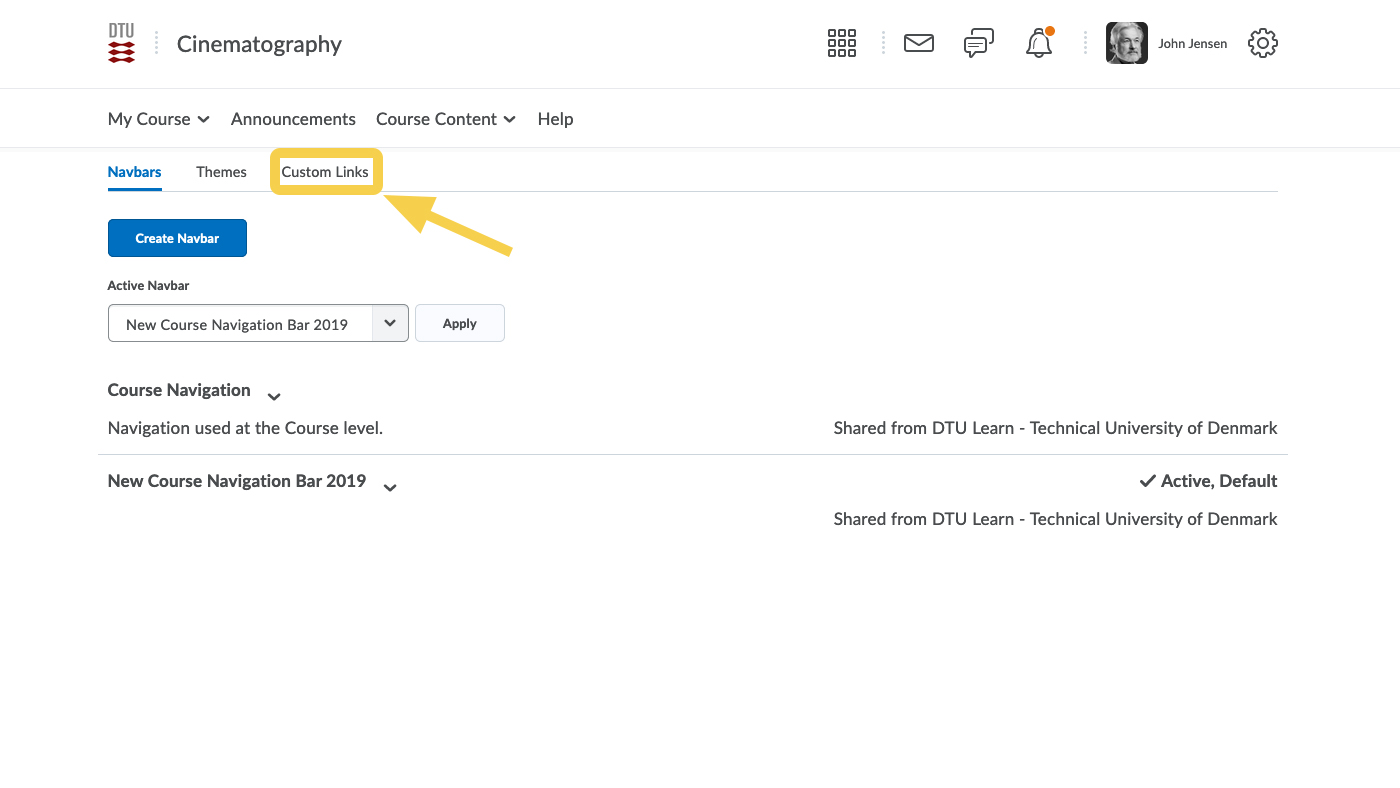
- Select Custom Links.

- You can choose between creating a new link or a new link group. In this case we want to Create a new Link Group
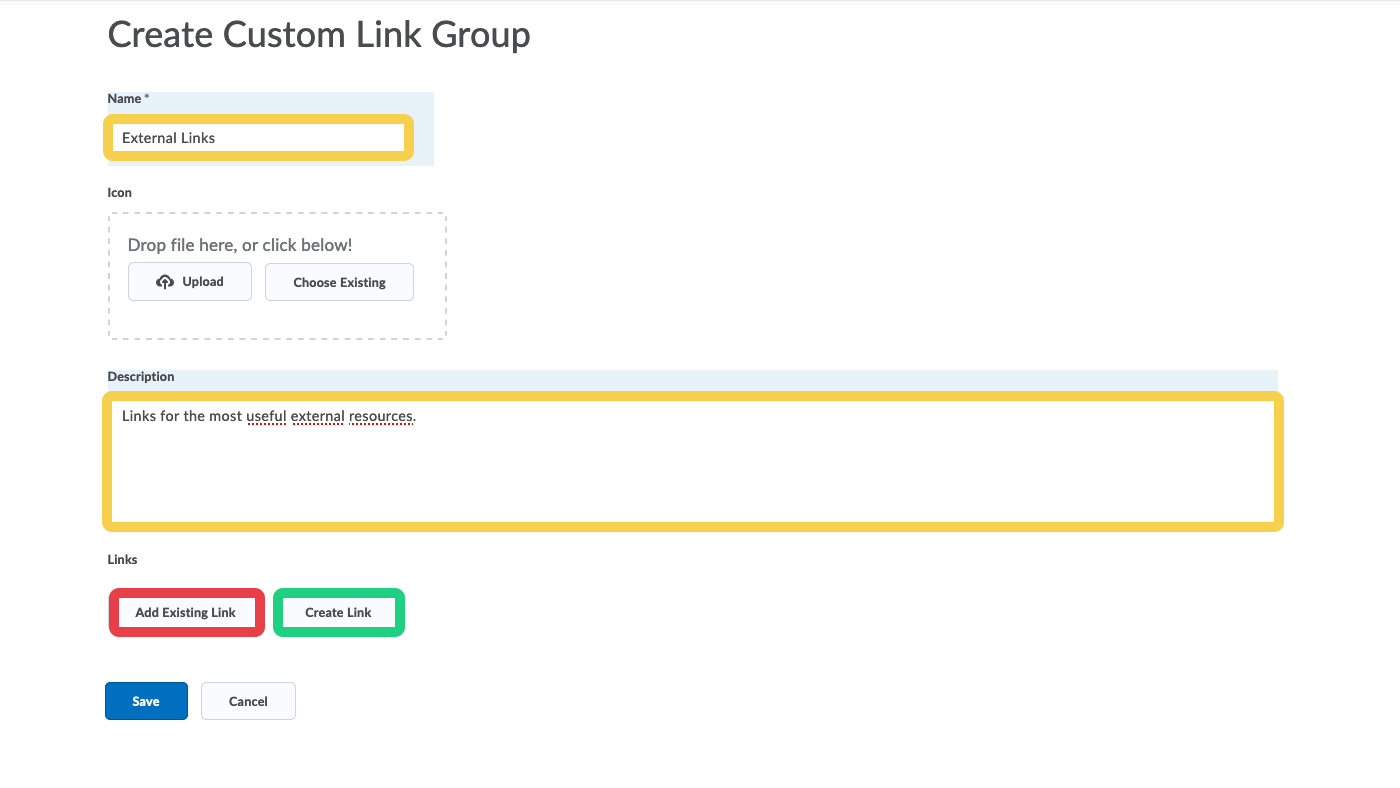
- Start with a name and a desription for the link group. You can add existing links, eg. assignments or attendance, or you can create a new link. In this course I want to create new links to external resources that the students will find useful.
- When the links have been created, click Save. To add the new group to the navbar go to the third part of this tutorial: Create New Navbar

Modify a link group:
- From your course, click the button on the right hand side of the navbar, and select Manage All Course Navbars.

- Select Custom Links.
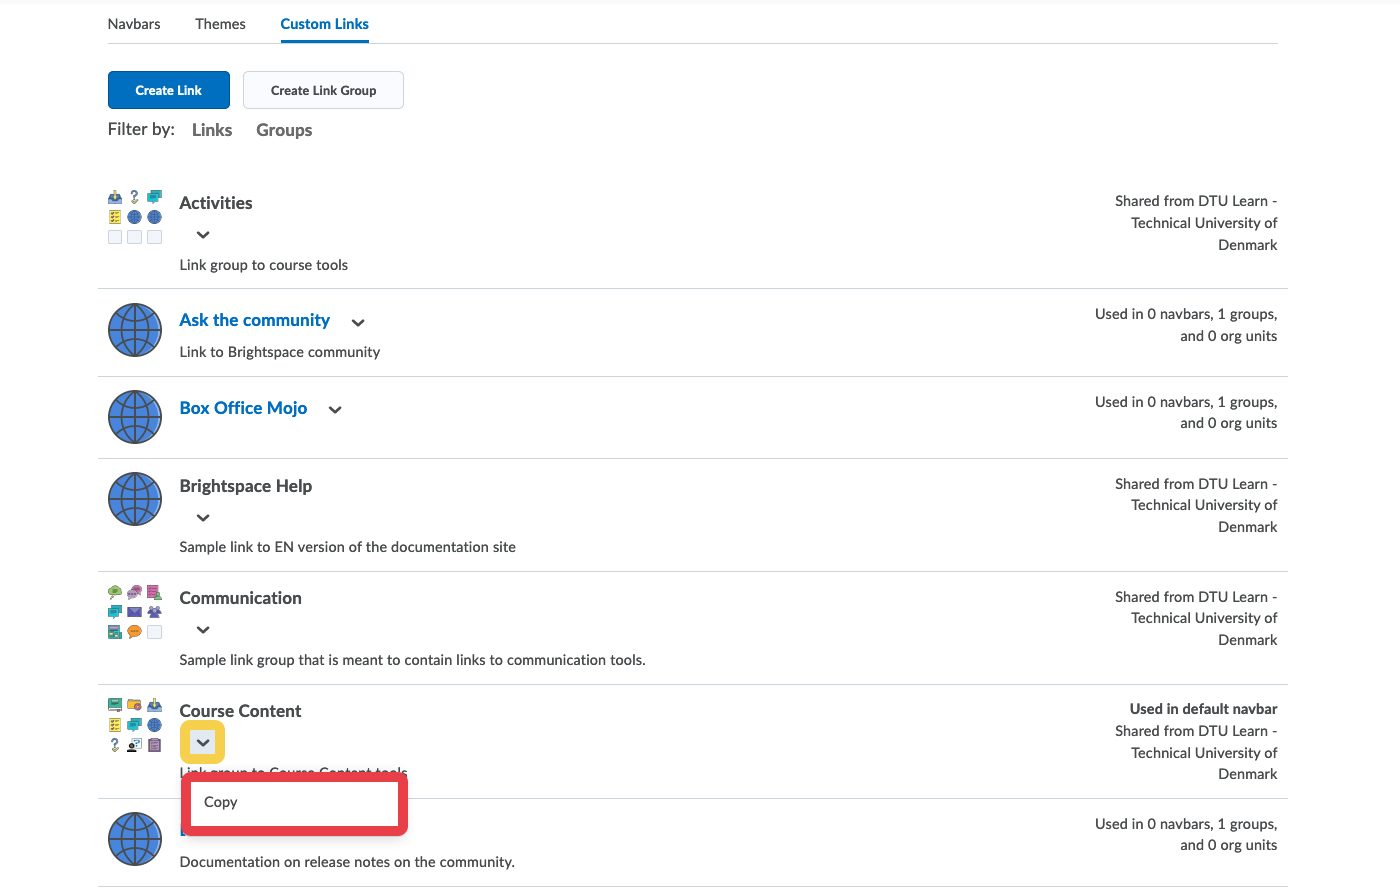
- Select the link group you want to modify. Click the small arrow and select copy. You need to make a new copy, when the original is a part of a default navbar (look in your right hand side of the screen to see this info).
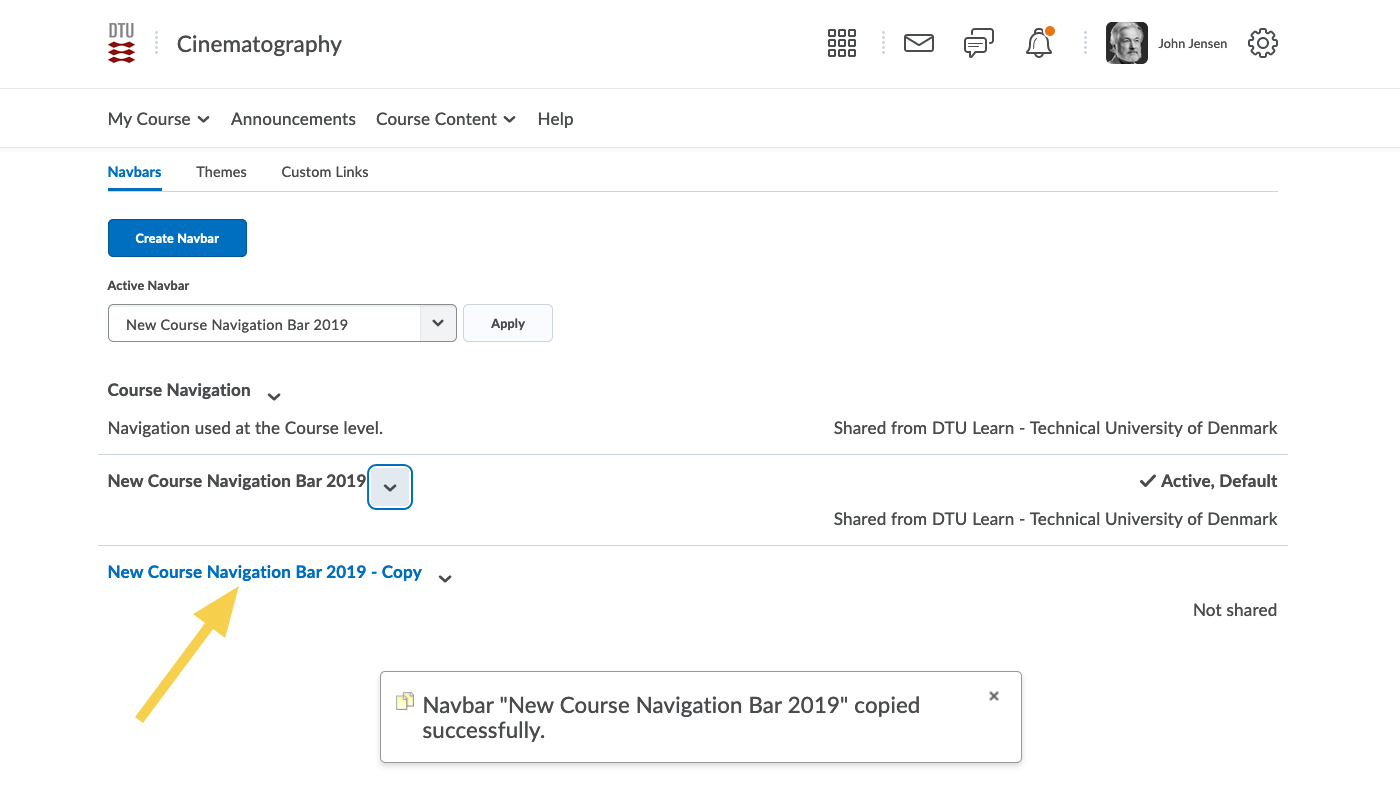
- You can now see your new copy. Select this.

- You might want to change the name and description to avoid confusion. You can delete links be clicking the (x) and change position by dragging the 8 small dots around. Add existing Links or Create New Links. Click Save when you are done.

Create new navbar:
- From your course, click the button on the right hand side of the navbar, and select Manage All Course Navbars.

- On this page you can see the active navbar and you can see the available navbars. To create a new you can click Create Navbar or you can copy an existing. This might be easier, unless you want to make massive changes. In this example we will make a copy.

- Select the new copy. Some navbars are "Shared from DTU Learn" This means that you can´t modify or change them. And that is the reason that you need to make a copy.
- Give you navbar a name.
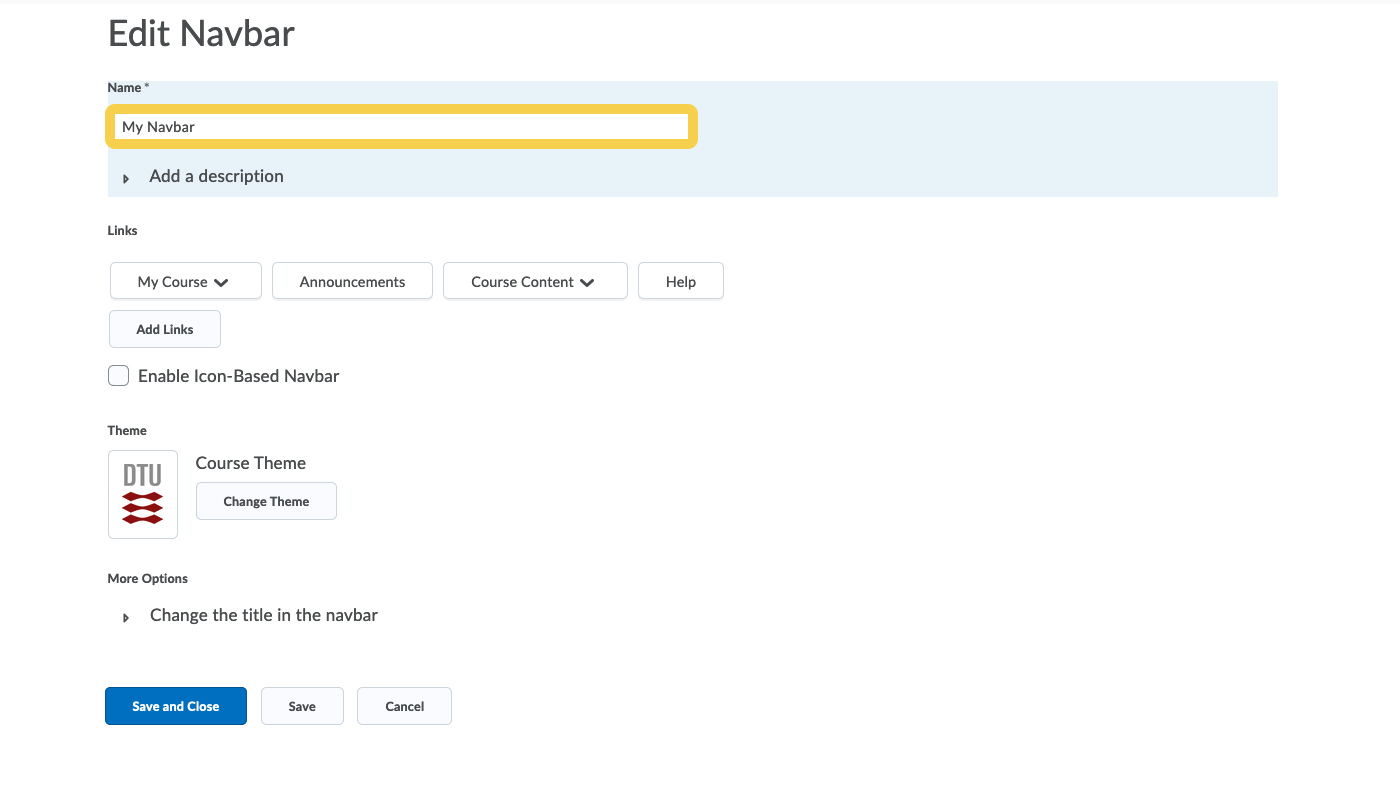
- You can delete the links and link groups by clicking the x.

- After deleting the links you don´t want, you can add new links.

- Select the link groups or links you want to add.
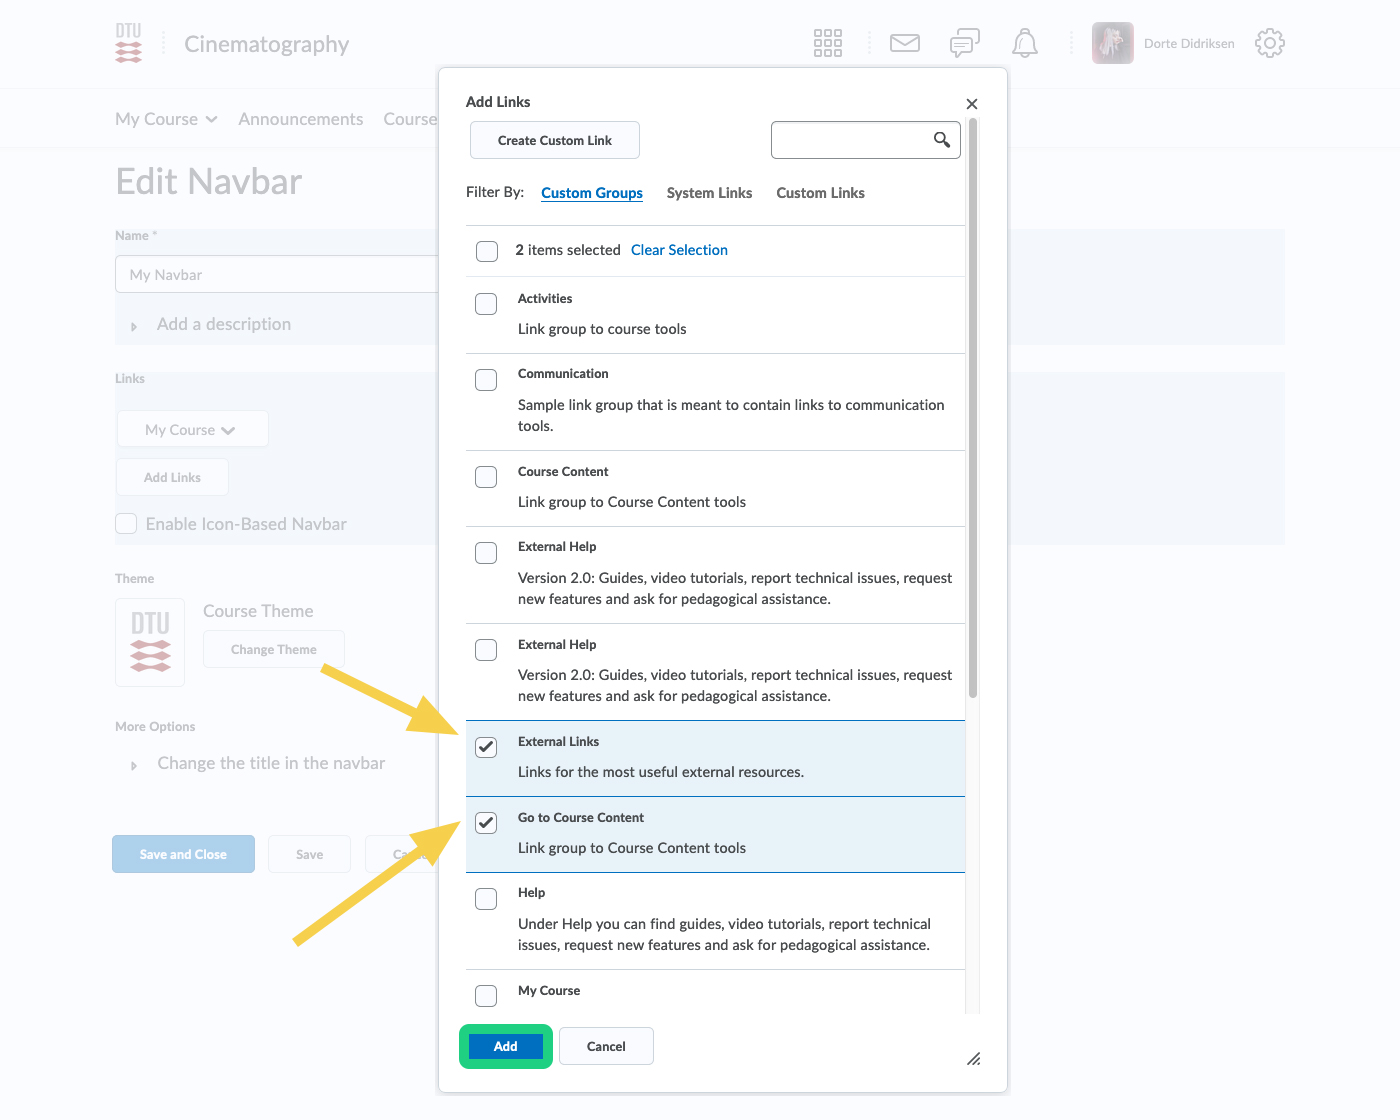
- When you are done editing, hit Save and Close

- To change the active navbar, click the drop-down arrow...
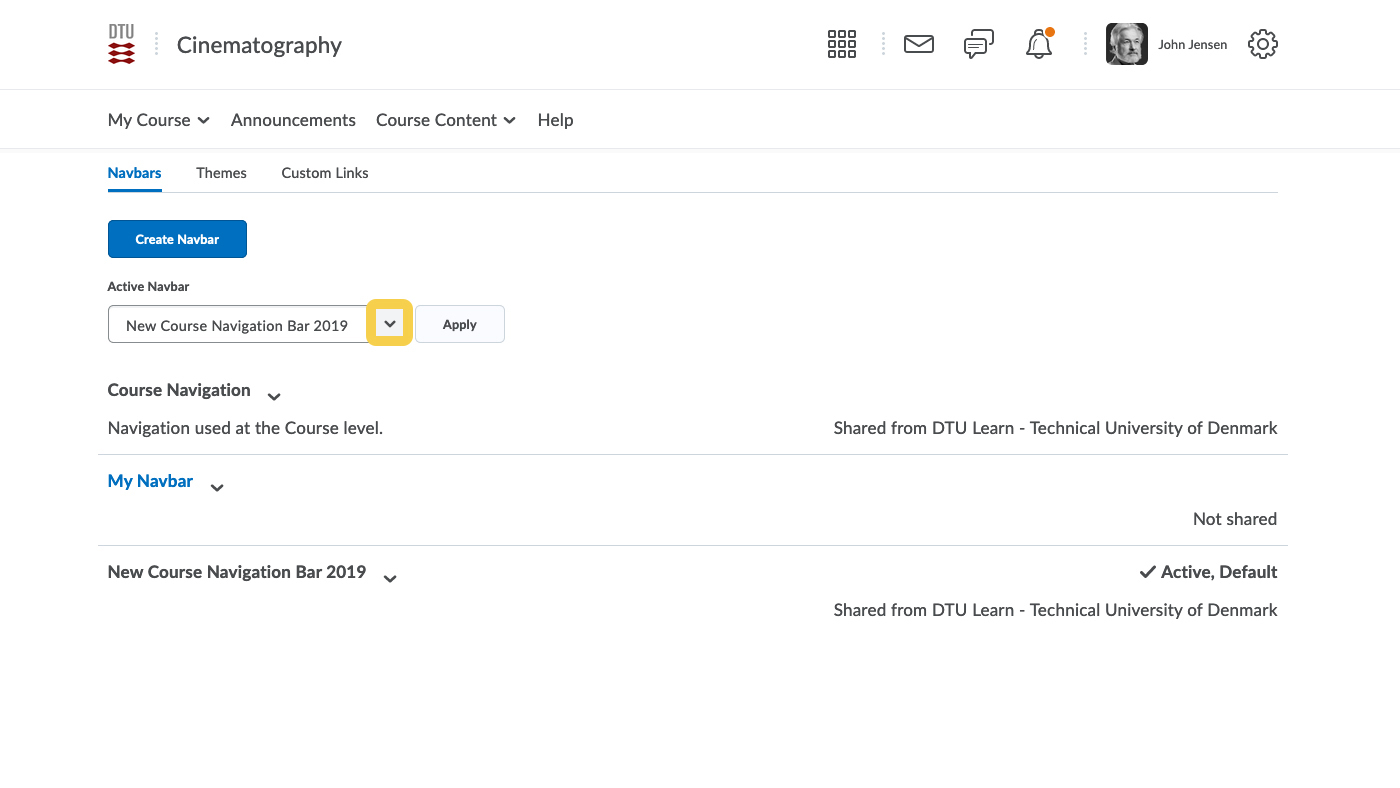
- ...and select the new navbar. Click Apply.

- The new navbar is now visible in the course.
