Creating a Unit
This tutorial shows how to create a unit
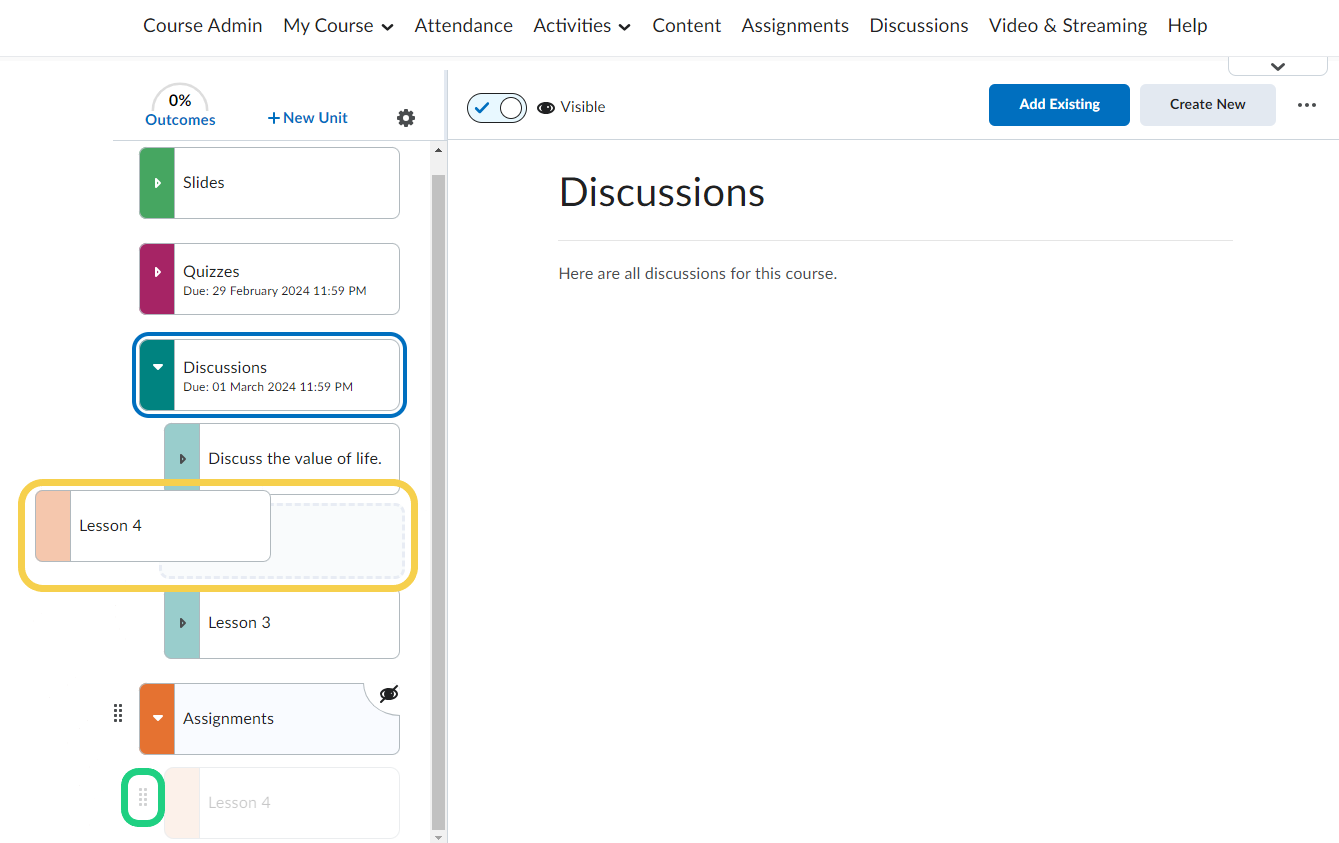
This tutorial shows how to create units and lessons, add structure to your course and how to organize your content by click-dragging.
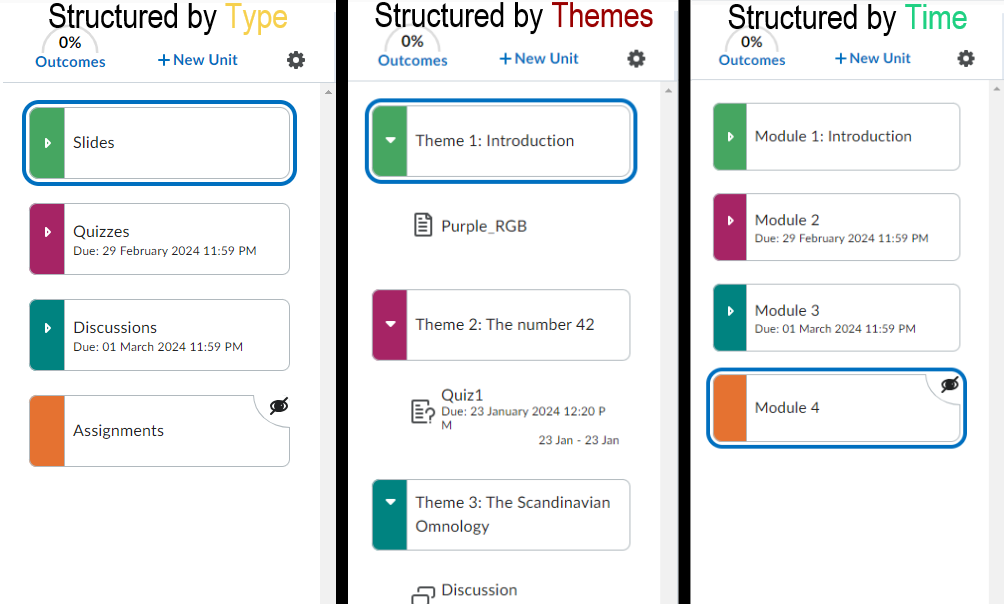
There are multiple ways of structuring your course, and you should choose the one that fits your course and your teaching style best. The chart below shows three popular styles: Structure by time, themes, or type.
Follow these steps:
- Start out in your course content.

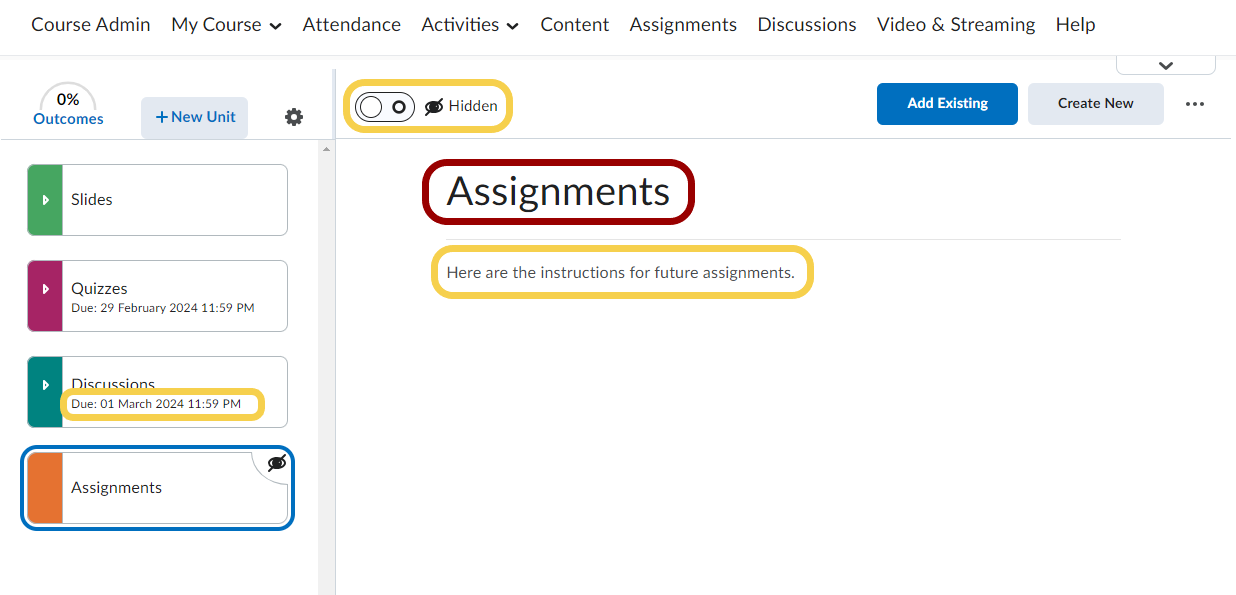
- In the left hand side of the page you can see an overview of your units.

- To add a new unit, click "New Unit".

- Give your new unit a title and a description and click on 'Save and Close'.
Without a proper description your unit will be empty on your content page.
- Your new unit is now created, and is visible in the navigation overview.

- If you click on a unit in your navigation overview, you will be able to see the title, descriptions, content, and lessons of the module in the right pane of the screen. You can also see if the module has been published (i.e. is visible to the students), or in draft mode (i.e. not visible to the students).
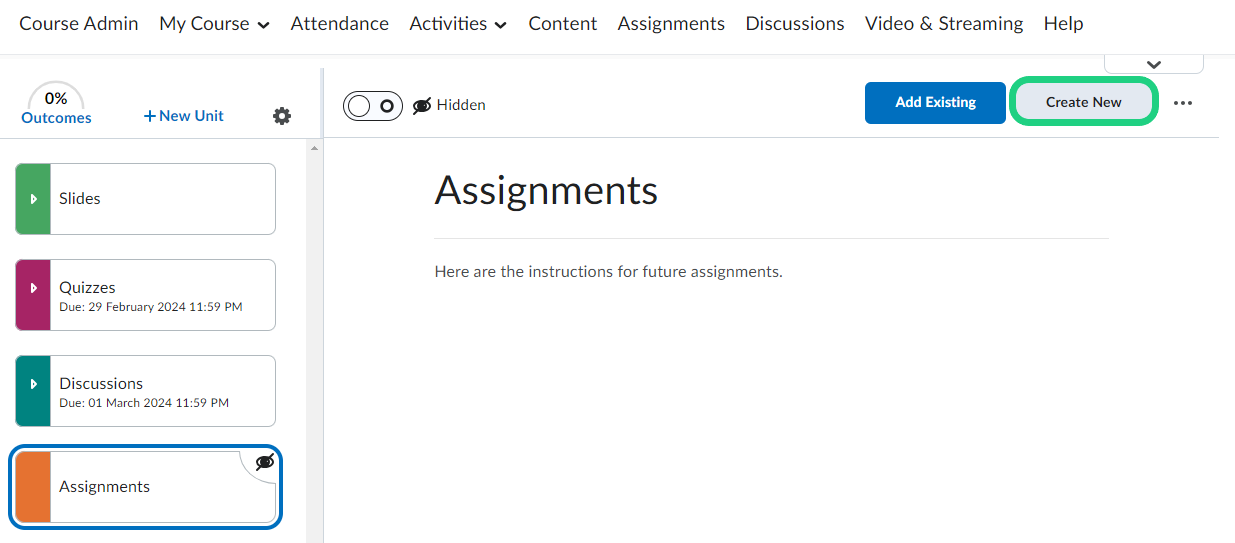
- To add a lesson inside your unit, click 'Create New'.
- Click on 'New Lesson'. Give your lesson a name and a description and click on 'Save and Close'.
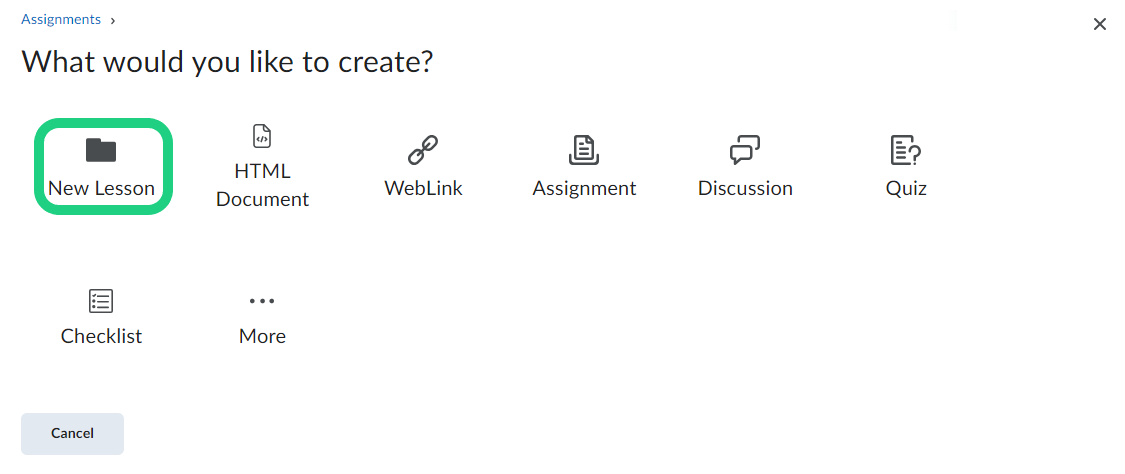
- The lesson will appear in the navigation overview if you expand the unit contents. Note: If the list of units and lessons in the navigation overview is too long to provide a sufficient overview, you can collapse lessons into their unit in the overview by simply clicking on the unit.

- In the navigation overview you can see a difference in alignment, which tells you whether an item is a unit or a lesson.
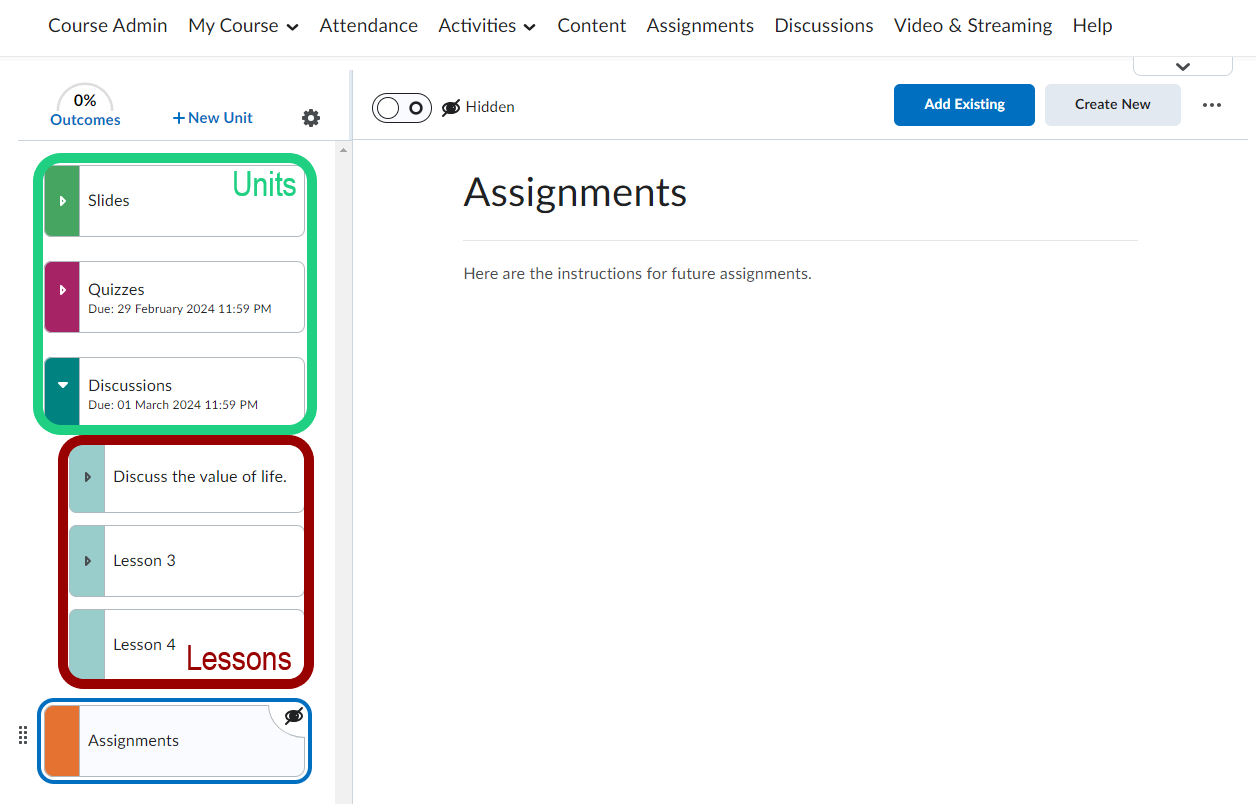
- After creation, you can organize your units and lessons by click-dragging on the dots next to the name of the unit/lesson.
