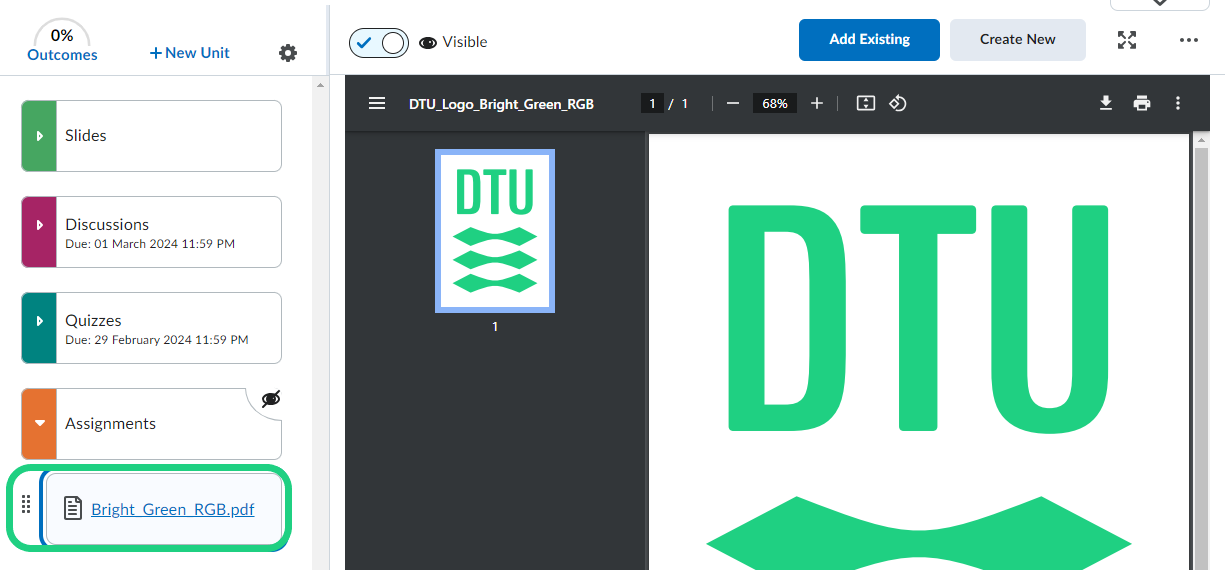
Adding a File to Content from Manage Files
This tutorial shows how to add files to Content from Manage Files using one of two different approaches
When you have uploaded content through Manage Files, you can add it to the content of your course in two different ways. One way is from the Manage files tool, and is recommended if you are working with several files and folders. If you just need to apply one file to your content, you might find is easier to use the second option.
Video on how add content from 'Manage Files':
From the Manage Files tool:
- Go to Manage Files from the Course Admin menu in your course.

- Select the file or files you want to add to the content.
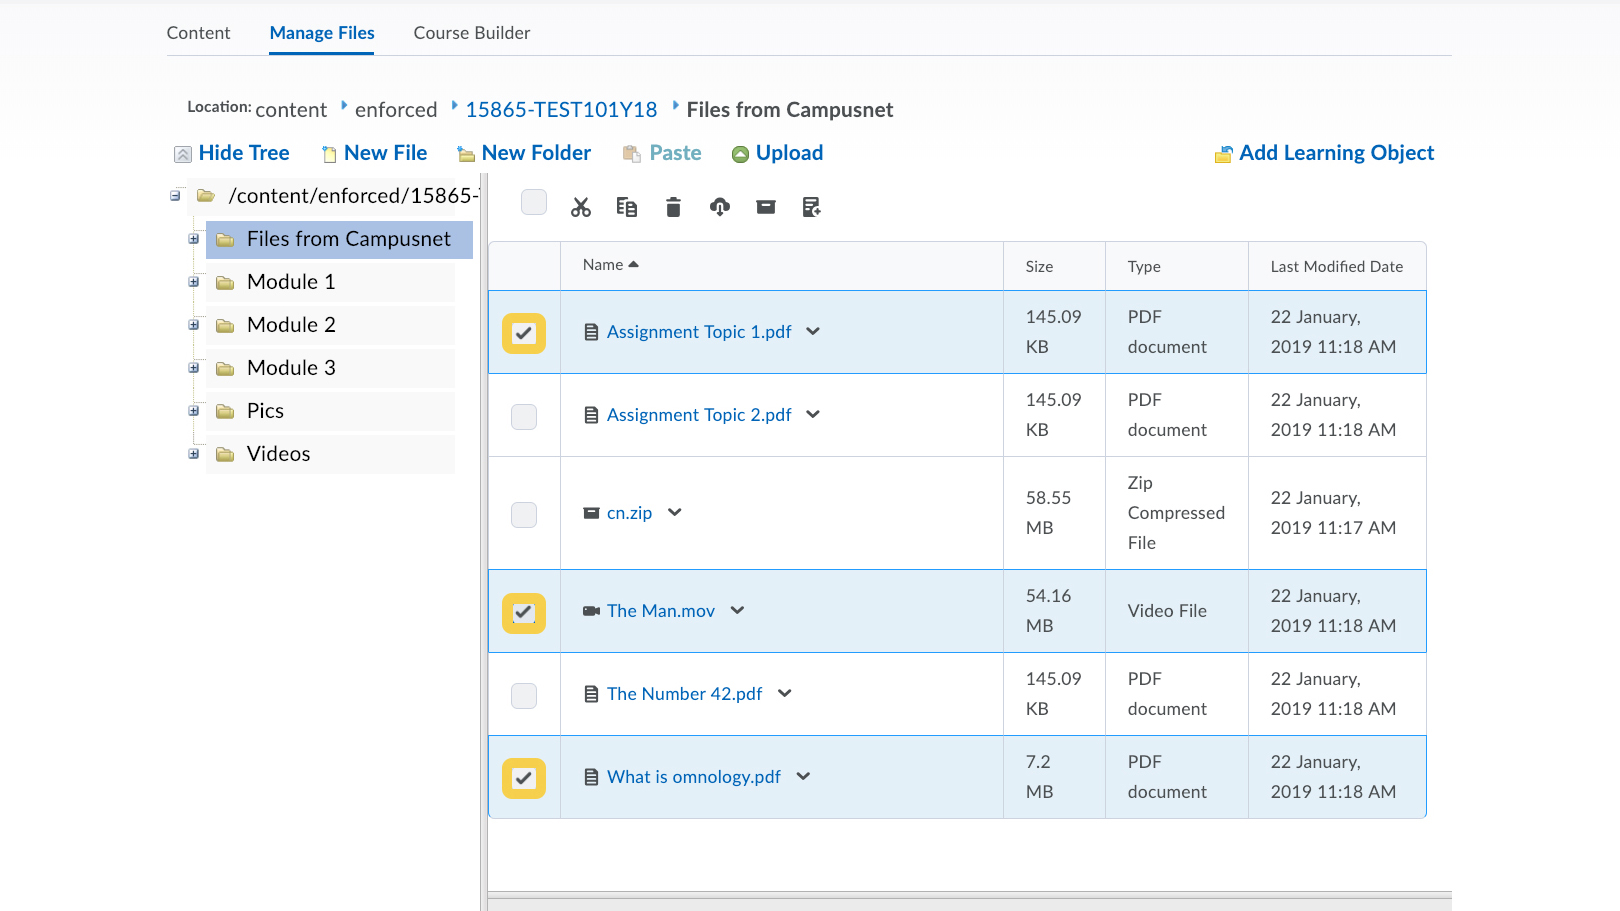
- Click the Add content topics button.

- Select a parent module or submodule.
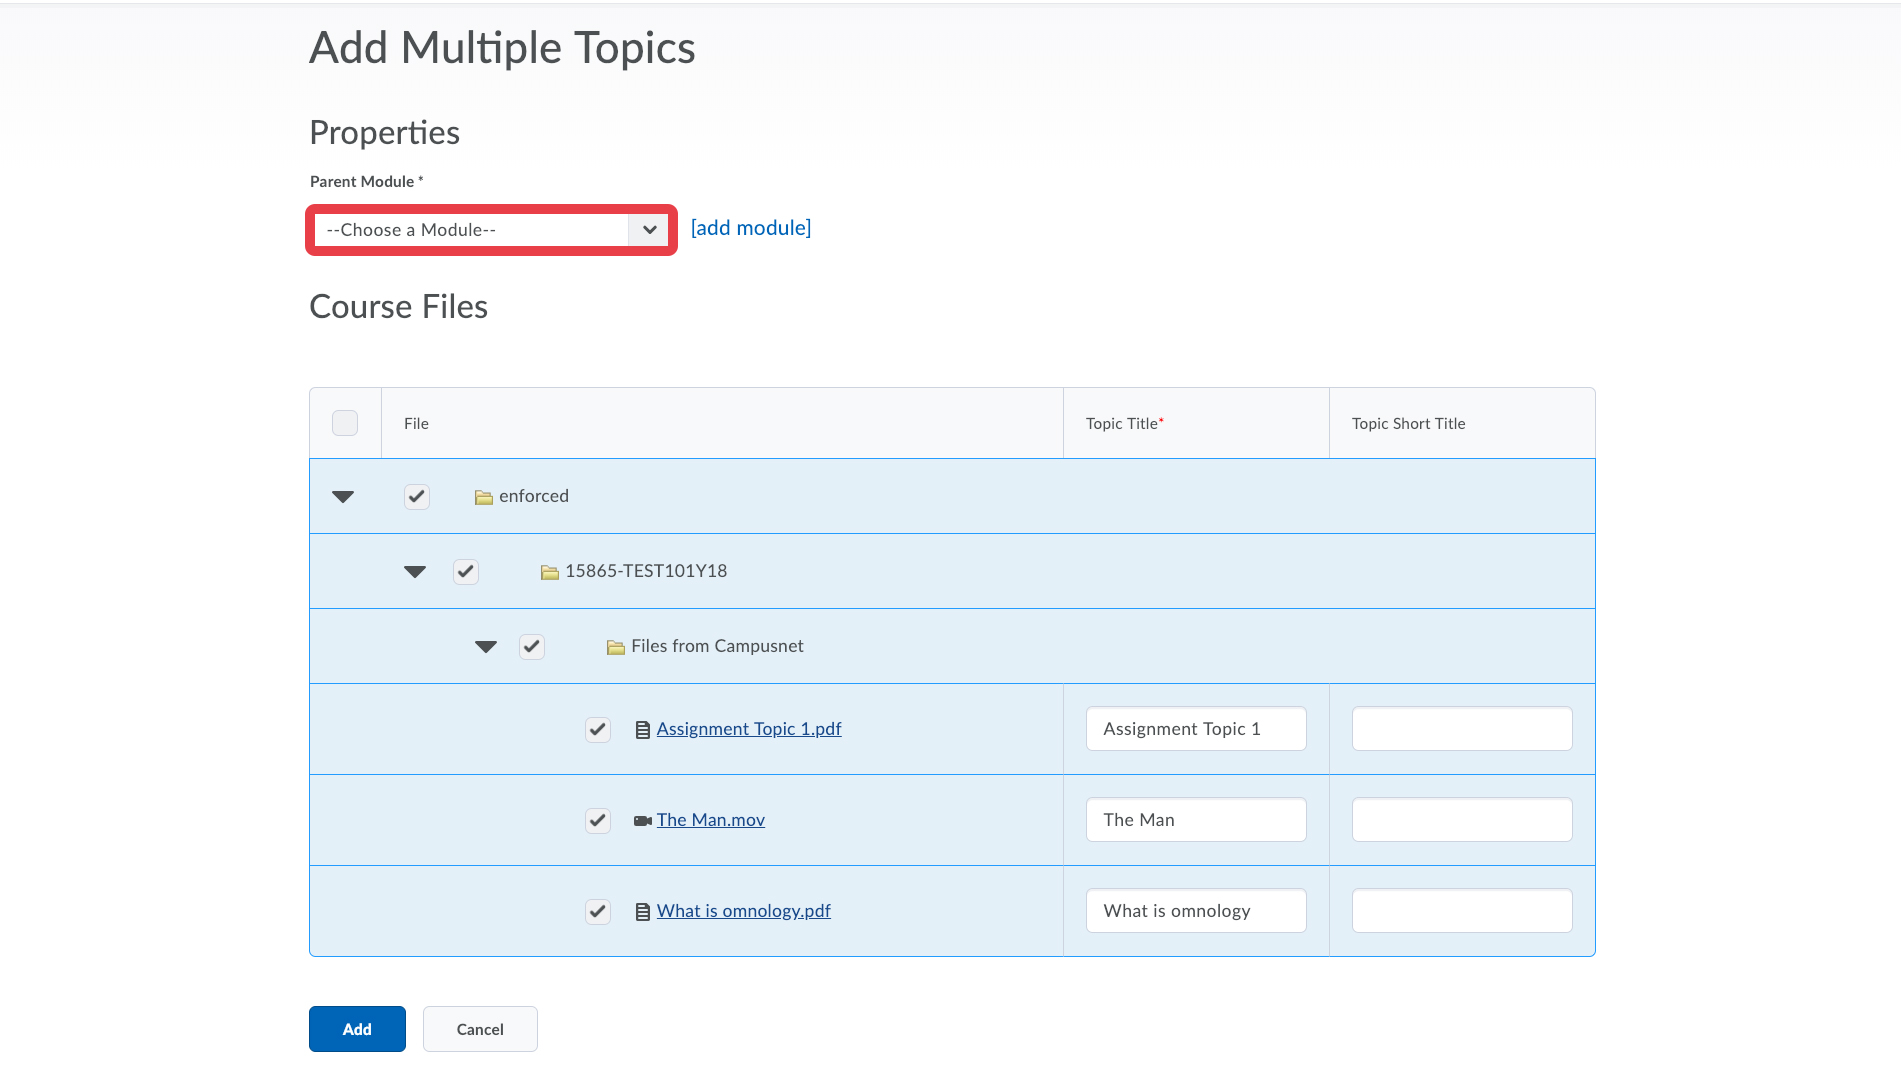
- If you want you can give the topics a title.

- Click Add when you are done.

- From your course content you can see the files. You can drag the files around in the module and submodules.

From the course Content tool:
- Go to the course content, and select the unit and subunit you are working on.
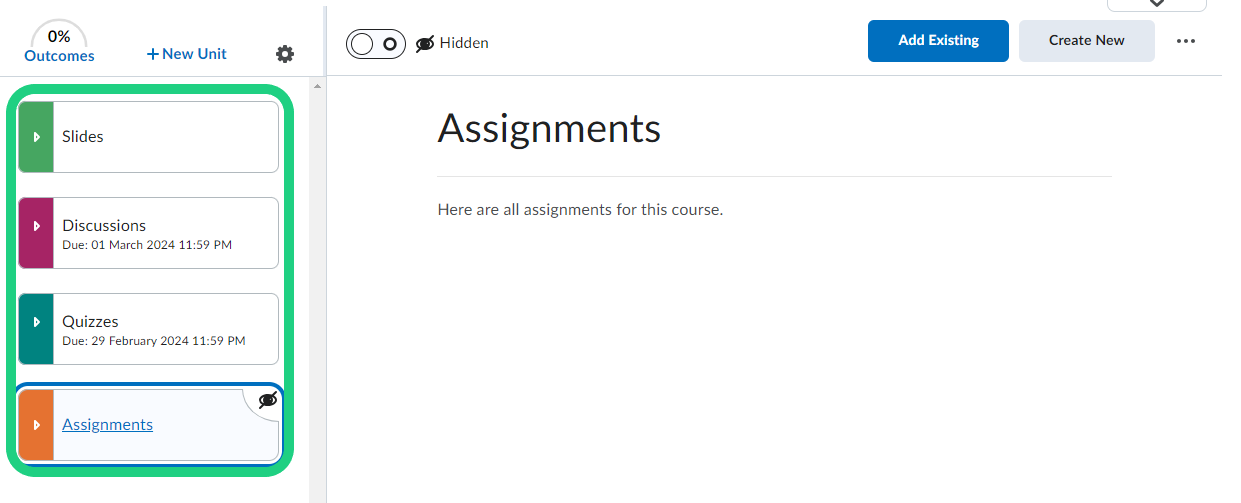
- Click Add Existing.
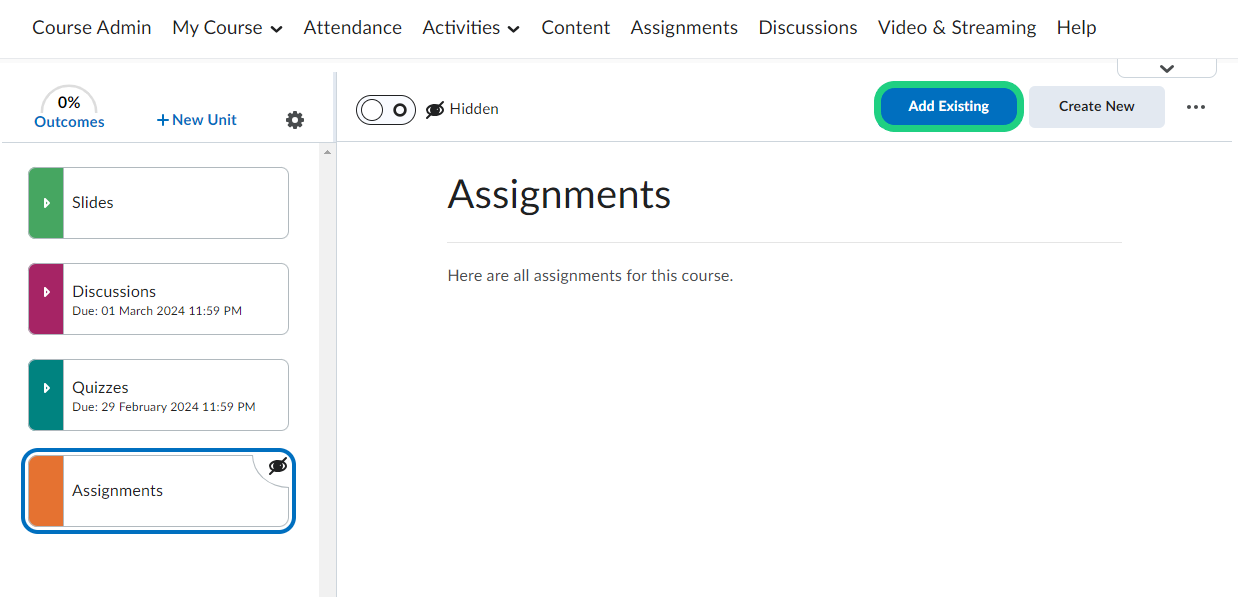
- Select More.
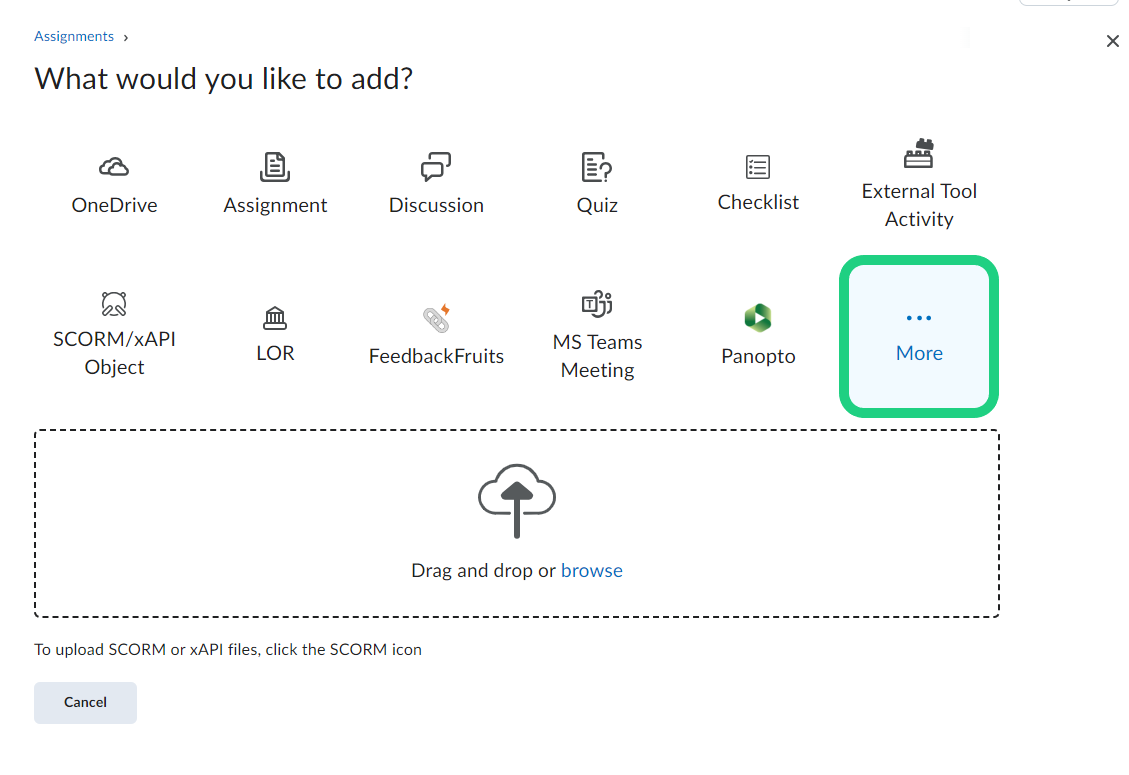
- Click Course File.
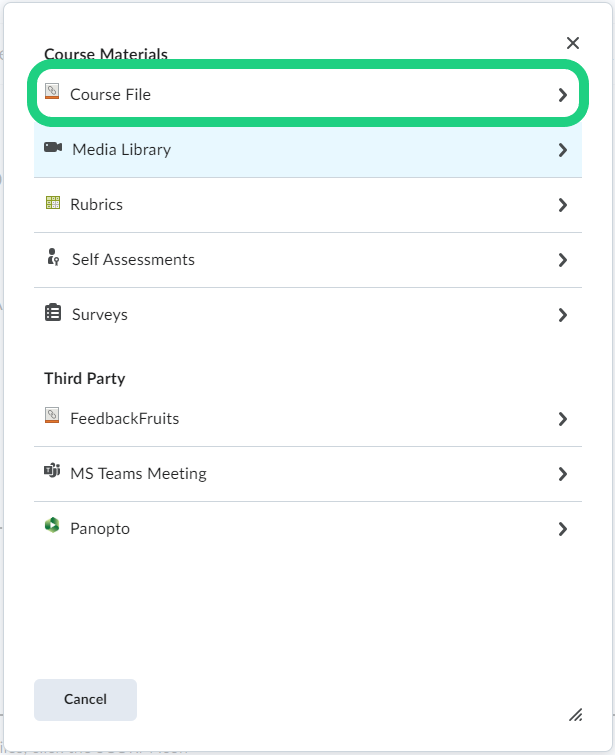
- Select the file you want to add.

- Your file is now visible in the unit. You can drag the file around if you want another structure.
