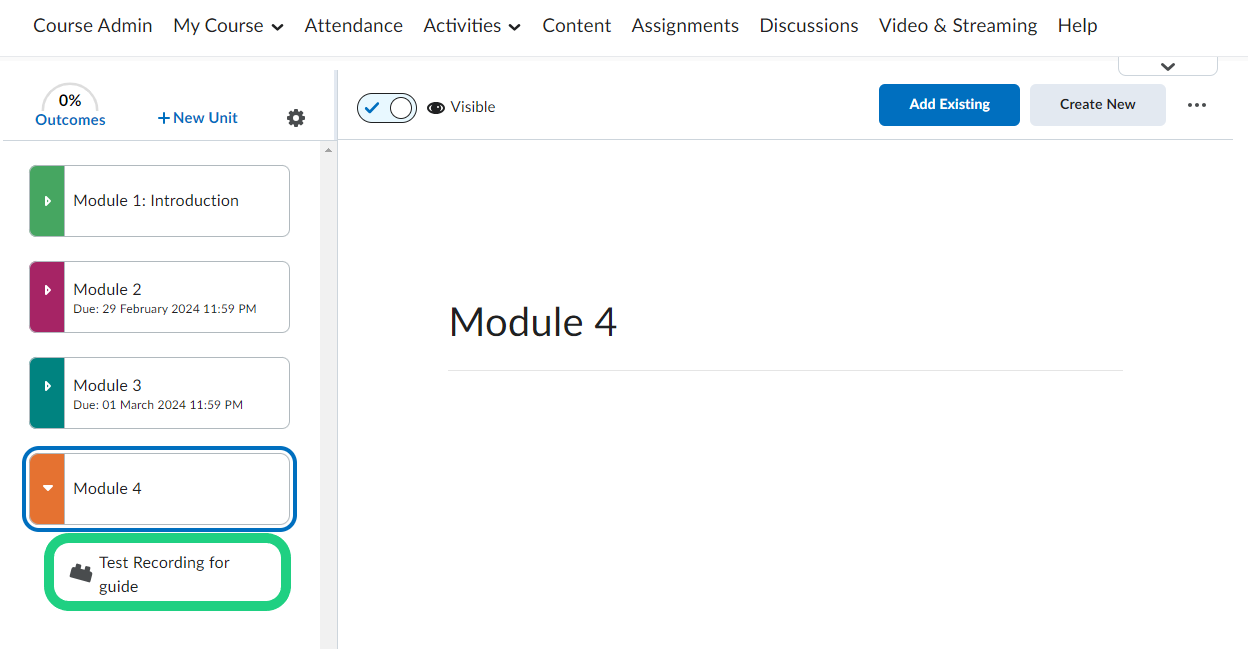
Adding a Video from Panopto.dtu.dk
This tutorial shows how to add a video from panopto.dtu.dk to your DTU Learn course.
Note: The interface language of panopto is dependent on your browser language. You might need to explicitly choose a language in the browser settings for Panopto to be able to identify the language.
Follow these steps:
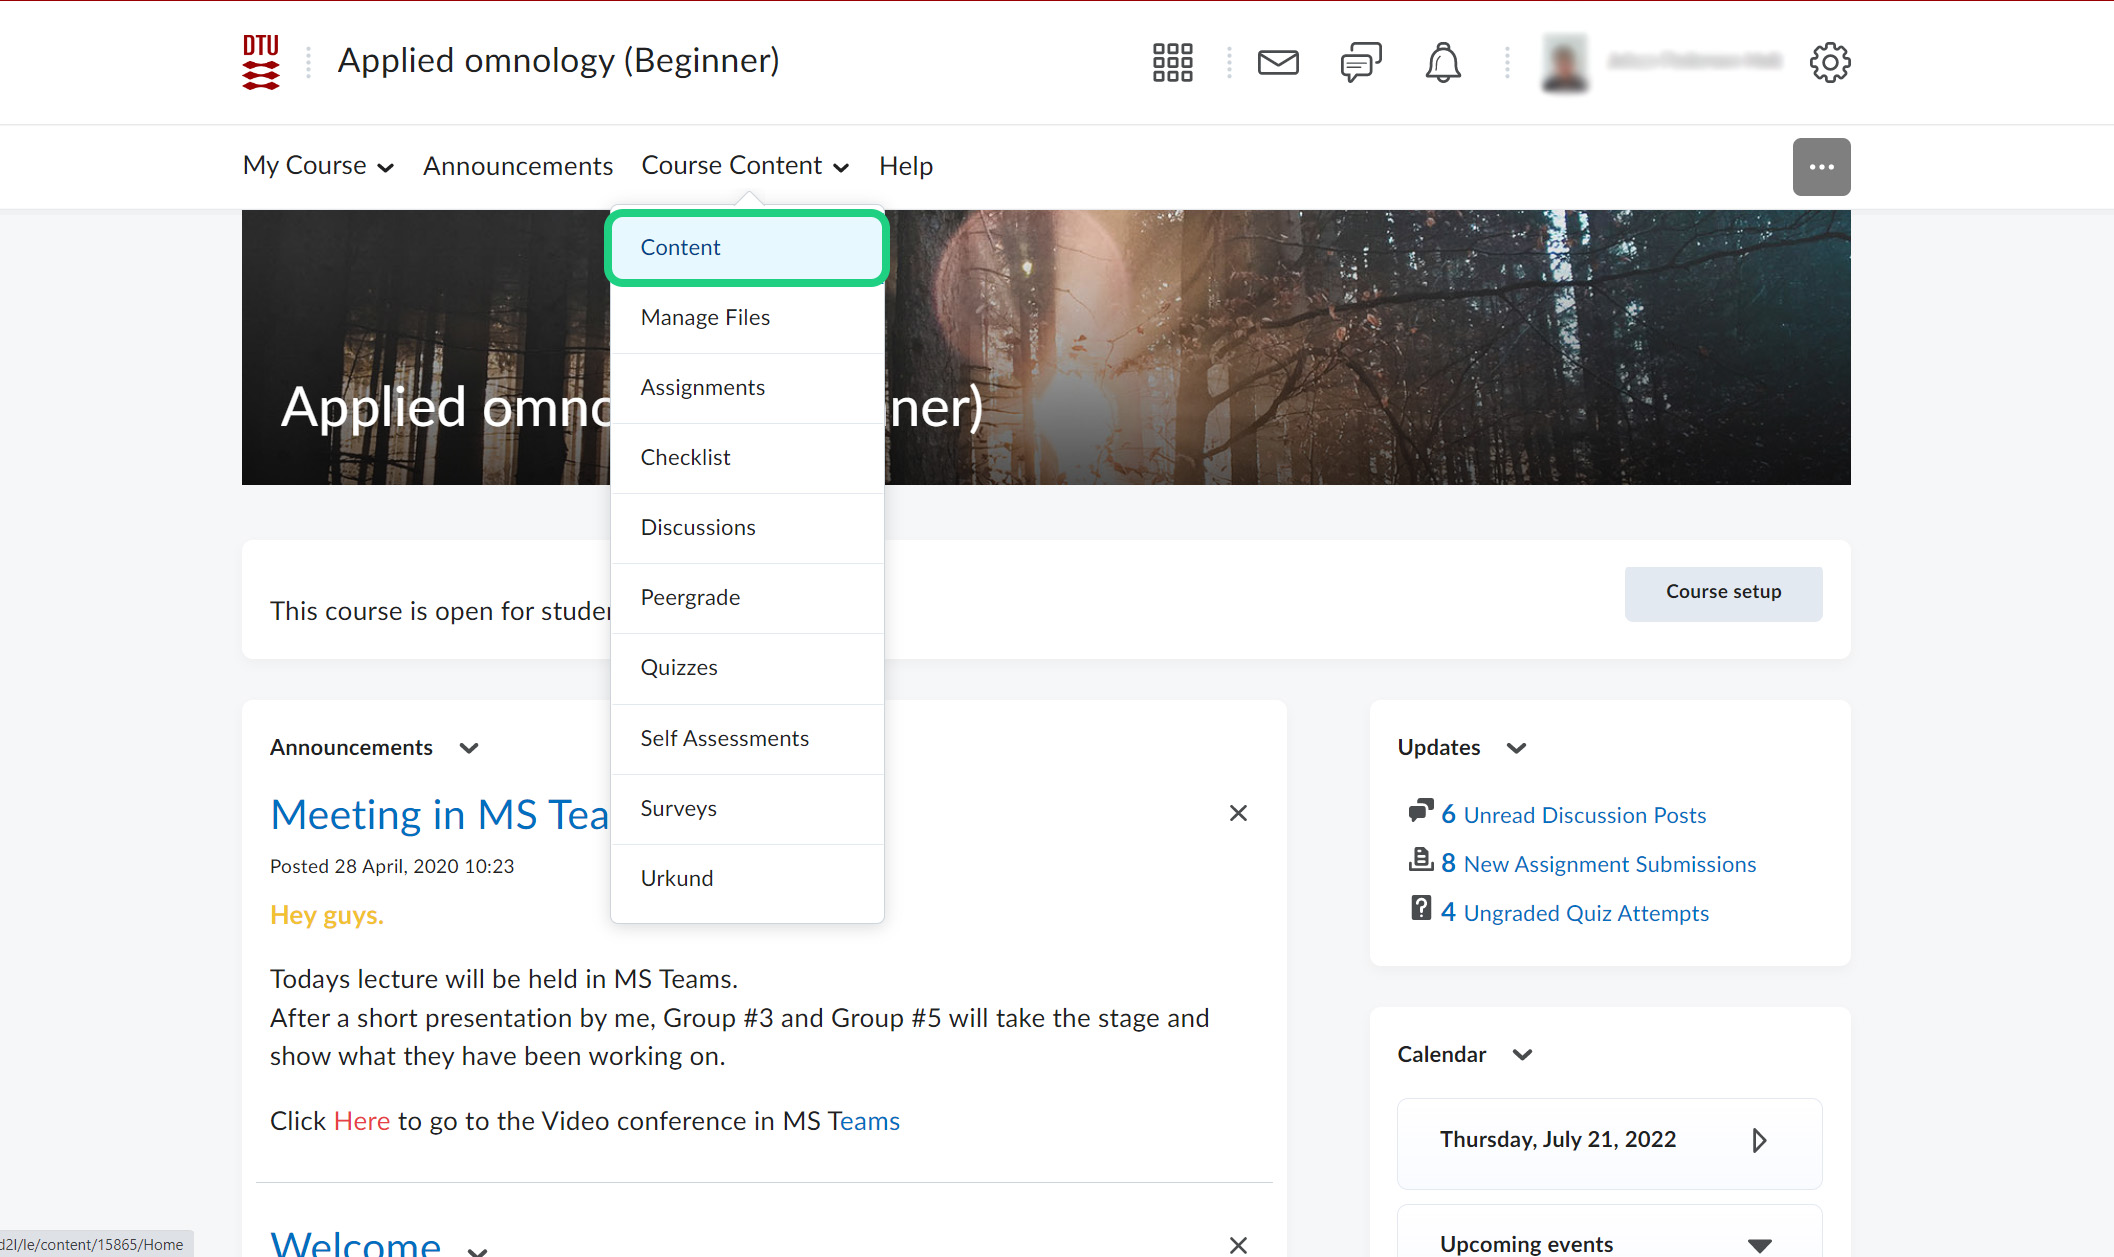
- Go to 'Course Content' and select 'Content'.
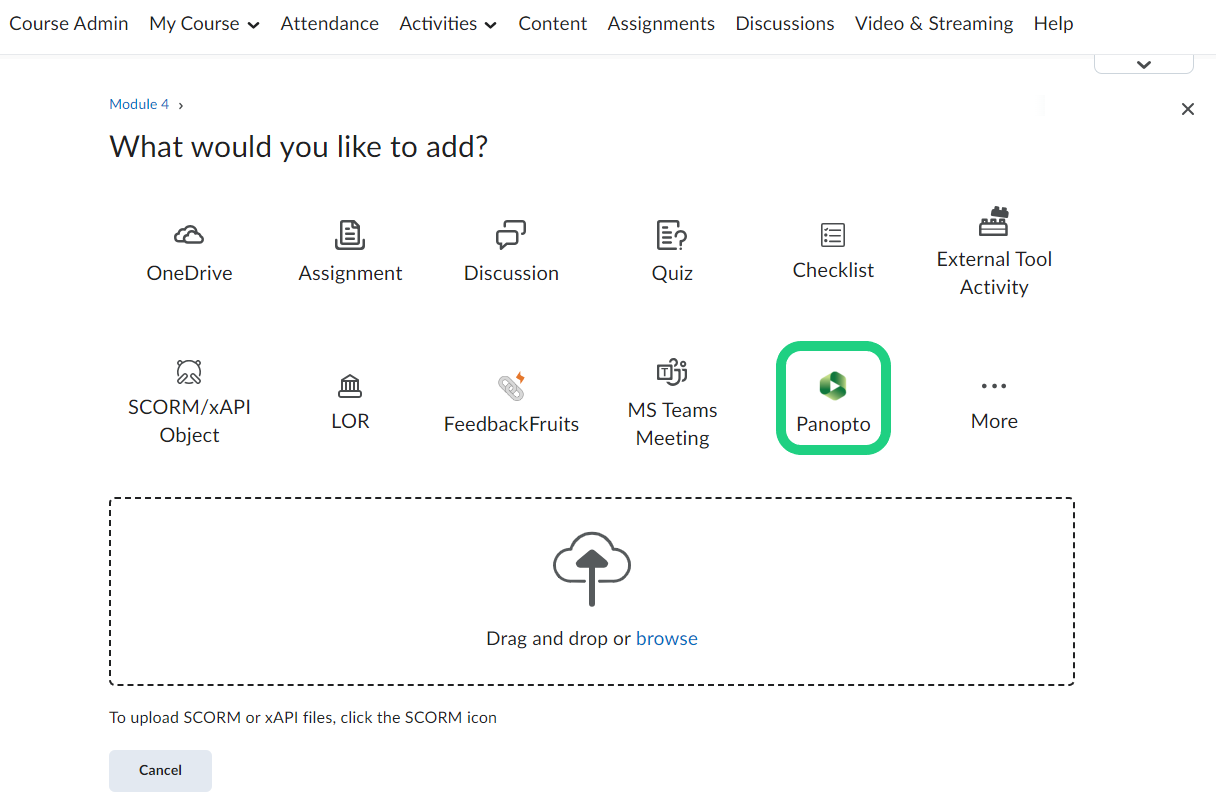
- Go to the relevant unit and choose 'Add Existing'.

- Select 'Panopto'.
- You now have three options.
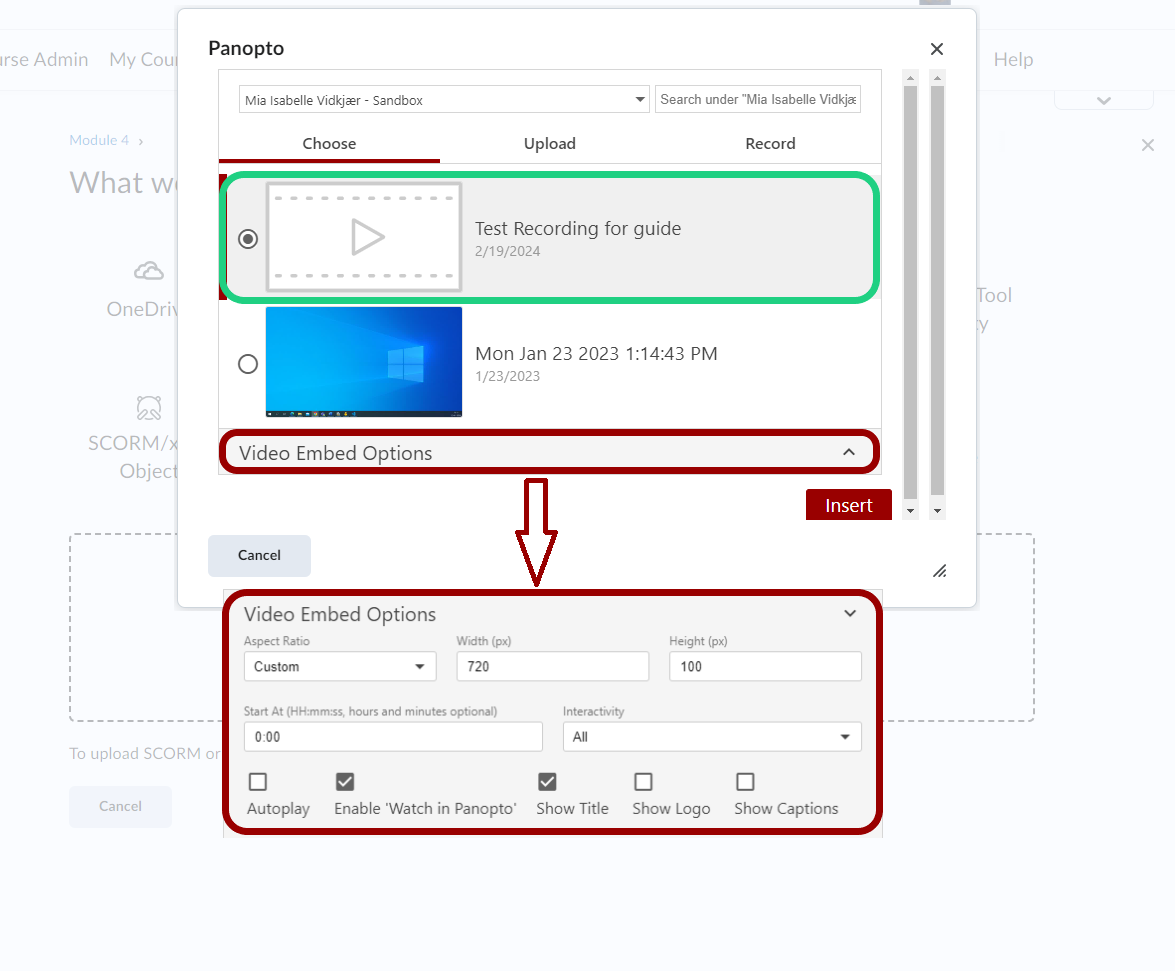
1. If you have already recorded and uploaded to the course folder in Panopto, you can choose the file under 'Choose'.
2. If you have already recorded in a separate program but not yet uploaded, choose 'Upload'.
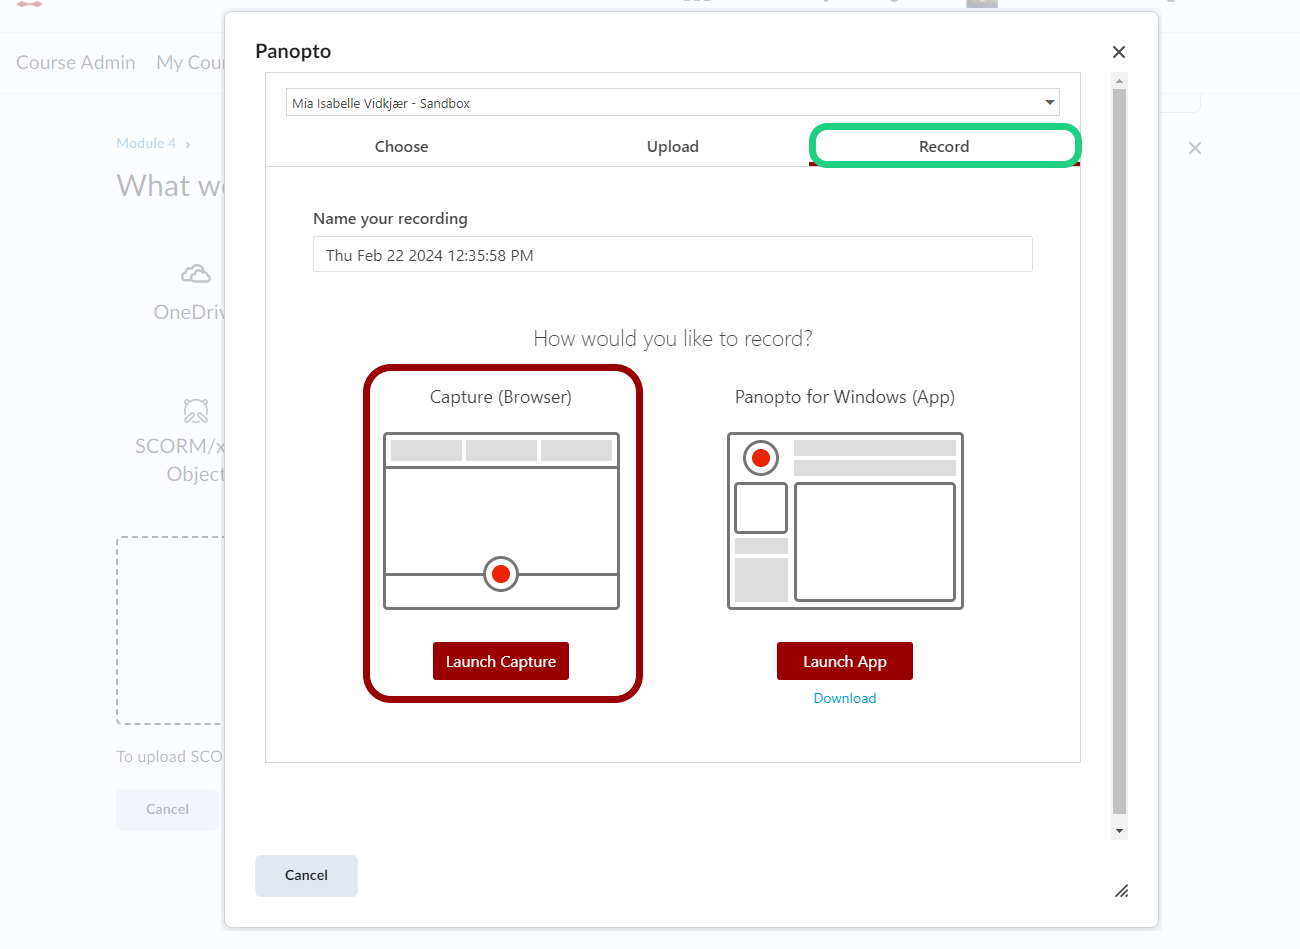
3. If you have yet to record, choose 'Record' and then use either the browser or the app recorder.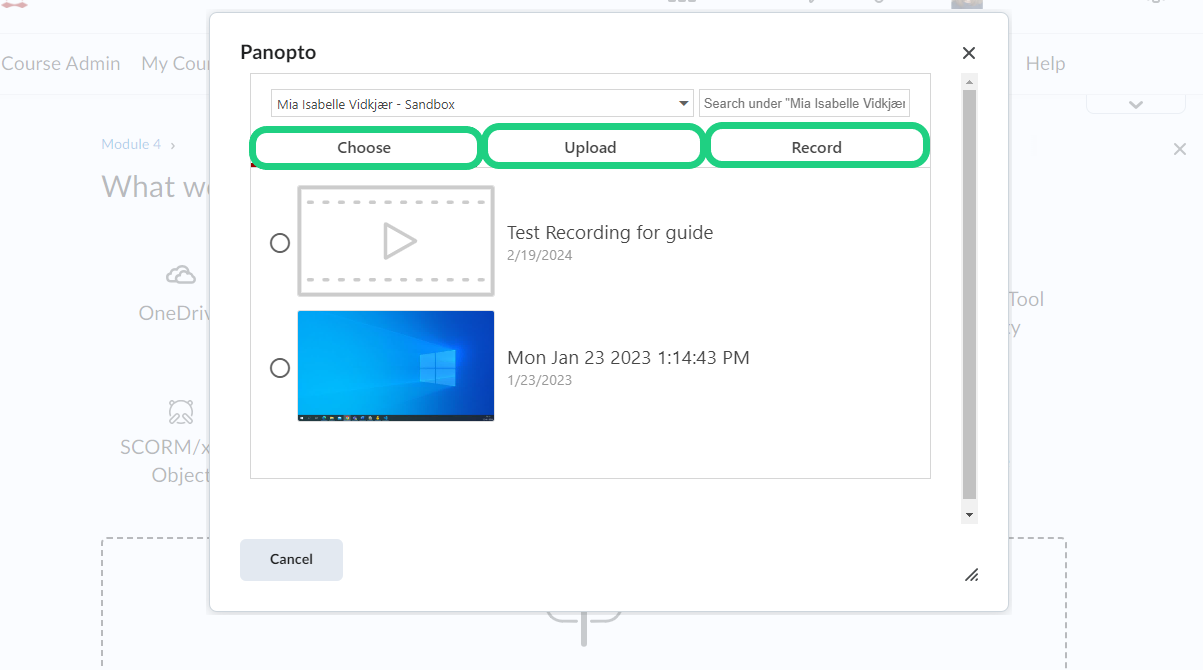
- For no. 1 and no. 2, after choosing/uploading the relevant video, you can change settings for the video under 'Video Embed Options'.
- For no. 3 we will only show the workflow for the online capture through the browser.
- Allow the website to 'Use your camera' and 'Use your microphone'.

- Choose recording settings by clicking the cogwheel.

- By clicking 'Screens and Apps' you can choose which 'screen' to record, as is i.e. the case with Zoom or Teams.
You start the recording by clicking the big red circle.
- After finishing the recording, you can change the name of the recording and choose which folder the recording should be saved in. Per standard, the folder will be the folder connected to the course you accessed Panopto from.

- By clicking 'Edit', a new window will open with a video editor.
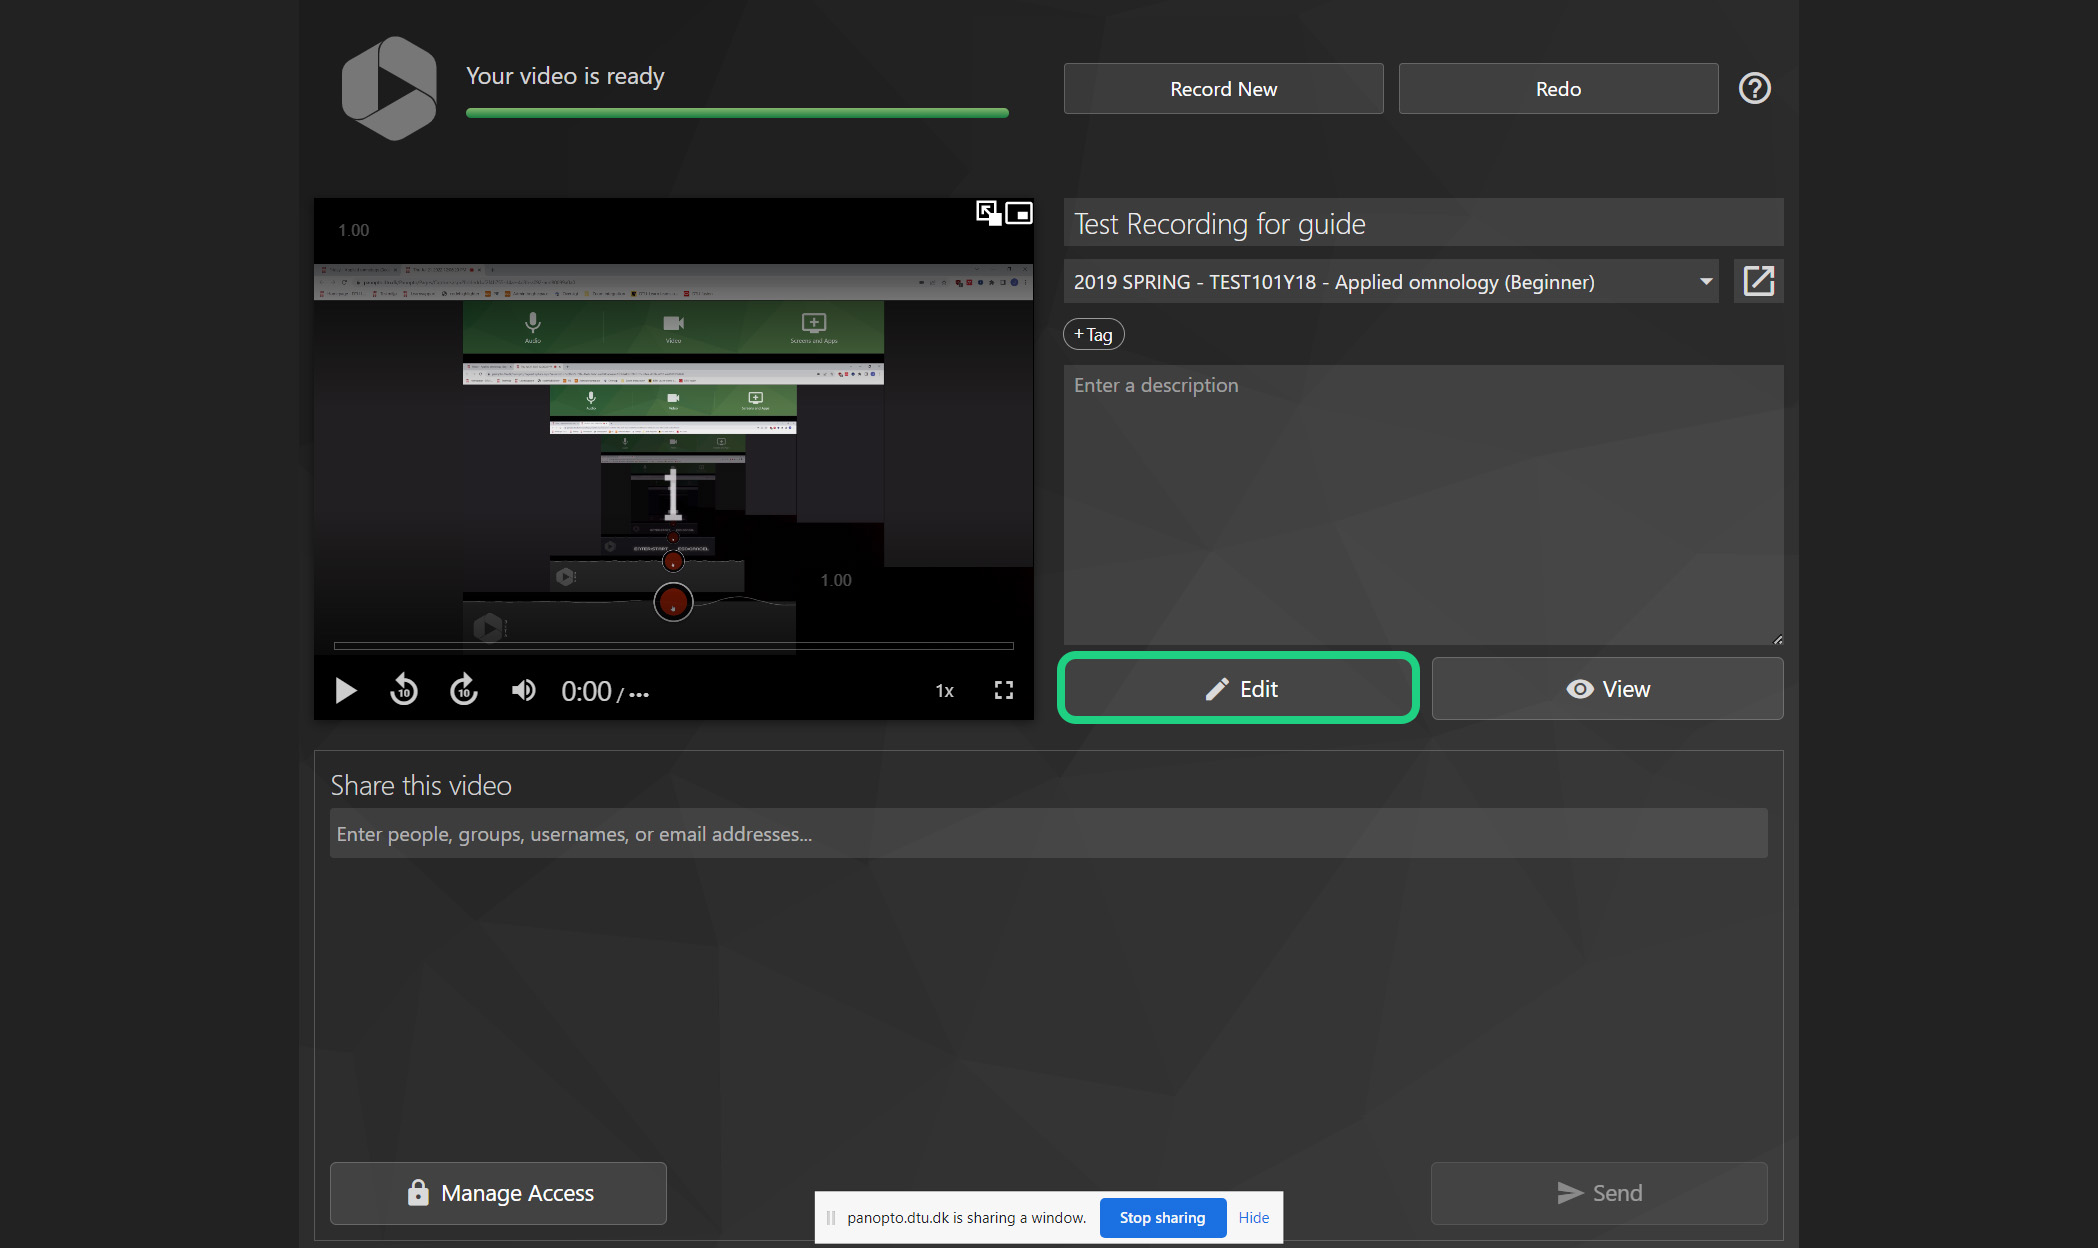
- You can cut and edit the recording to your liking. You can also add subtitles. Remember to click 'Apply' if you made any changes to the video.

- If you don't want to edit the video, you can close all recording/editing tabs and go back the DTU Learn tab you came from. The video will now be present and you can change the video settings under 'Video Embed Options'. Click 'Insert'.
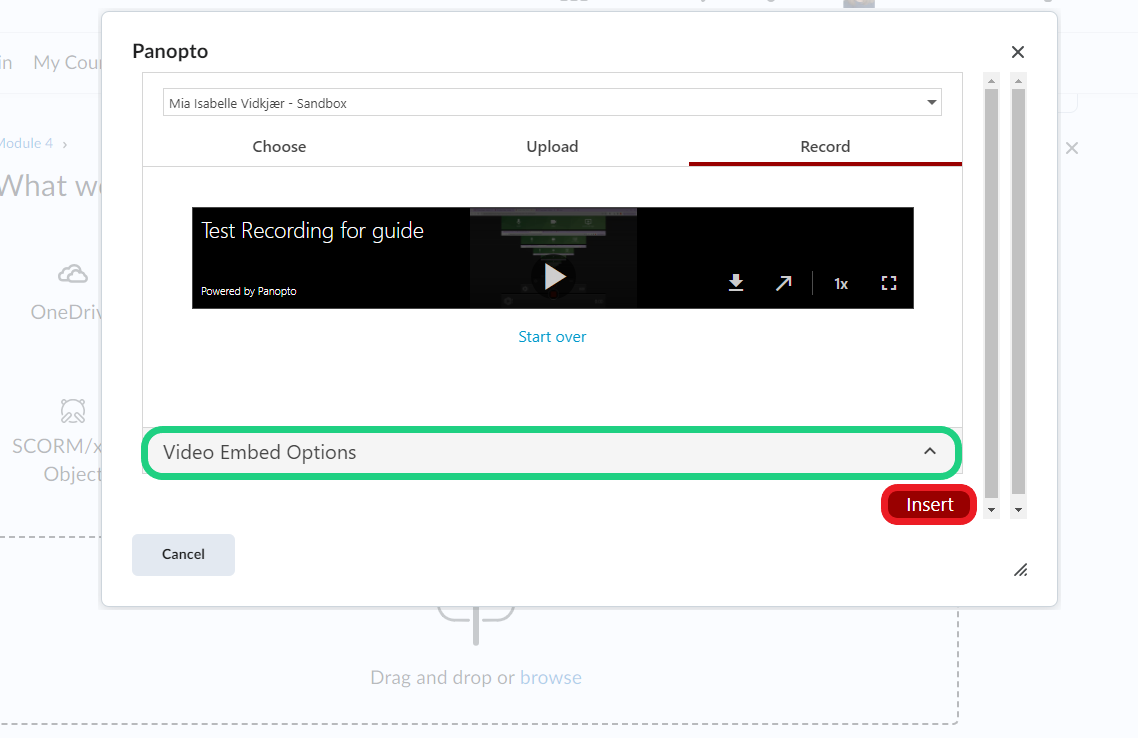
- The video is now available for the students to watch.
